

Insulated Lunch Tote Sewing Tutorial and NEW! Wildflower Boutique Bundle Boxes at ShopNZP.com

Make daily lunch time enjoyable with your very own designer Insulated Lunch Tote! Sew our Insulated Lunch Tote with easy fabric rectangles of Wildflower Boutique fabrics by Heather Peterson for Riley Blake Designs, along with Pellon’s Insul-Fleece & Insul-Film! Our Insulated Lunch Tote is fast and fun to sew with Nancy’s absolute easiest zipper technique!
Watch Stitch it! Sisters Program 108: Insulated Lunch Tote
Watch the Stitch it! Sisters Program 108: Cooler Insulated Lunch Tote with hosts Deanna Springer and Dana Casey. In this video, the Stitch it! Sisters share step-by-step fabric cutting and sewing techniques for making NZP’s Insulated Lunch Tote from our exclusive NZP’s Cooler Grocery Tote and Insulated Lunch Tote Pattern.

 Then, head over to ShopNZP.com and purchase our exclusive NEW! Insulated Lunch Tote Bundle Boxes! The NEW! Insulated Lunch Tote Bundle Box! features Wildflower Boutique Fabrics by Riley Blake Designs, and our Cooler Grocery Tote & Insulated Lunch Tote Pattern – with Classic Timesaving Tips by Nancy Zieman. The NEW! Insulated Lunch Tote Bundle Boxes! include everything you’ll need to make one Insulated Lunch Tote—you’ll supply the thread.

Sew an Insulated Lunch Tote, or Cooler Grocery Tote with Team NZP’s Cooler Grocery Tote & Insulated Lunch Tote Pattern. Pattern includes our easiest-ever zipper sewing techniques, and Classic Timesaving Tips by Nancy Zieman.
Insulated Lunch Tote Sewing Tutorial
Approximate finished size: 14″ W x 11″ L x 5″ D
Insulated Lunch Tote Tools & Supplies
- Exclusive NEW! Insulated Lunch Tote Bundle Box – Pattern included
- Clover’s Rotary Cutter and Mat, & Ruler
- Pattern Making Paper
- 6-1/2″ x 6-1/2″ Square Rotary Cutter Ruler
- Clover’s Wonder Clips, Clover’s Wrist Cushion for Wonder Clips
- Schmetz Denim Needle, Size 90/14
- Seam Stick
- Erasable fabric marking pen or Clover’s Chaco Liner
- Clover’s Double Sided Basting Tape
- Clover’s Straight Tailor’s Awl
- Clovers 2″ Bias Tape Maker
- Clover’s I Sew For Fun Heart Shaped Straight Pins
- Clover’s Pin ‘n Stow Magnetic Wrist Pin Cushion and/or Clover’s I Sew For Fun Heart-Shaped Magnetic Covered Pin Caddy
- Eze-View Pressing Cloth
- Clover’s 7-3/4″ Bordeaux Ultimate Shears
- Clover’s I Sew For Fun Sew Safe Presser Foot or 1/4″ Quilting Presser Foot
- Clover’s 6-in-1 Stick ‘n Stitch Guide
- Clover’s Retractable Tape Measure
- Clover’s 5-in-1 Sliding Gauge
- Clover’s Supersize 5-in-1 Sliding Gauge
- Quilter’s Starch Savvy
- Roller Presser Foot or Non-Stick Presser Foot

 Pre-shrink cotton fabrics fabrics by steaming and pressing, and steaming and pressing a second time, and then spray press and starch fabric with Quilter’s Starch Savvy — press and starch, press and starch.
Insulated Lunch Tote Sewing Tutorial

Prepare Fabrics from the NEW! Insulated Lunch Tote Bundle Box

To make our New! Insulated Lunch Tote, start by making the insulated lunch tote pattern with our easy instructions – included with our Cooler Grocery Tote and Insulated Lunch Tote Pattern.
Make the outer tote pattern:
- Cut a 15″ x 30″ rectangle from Pattern Making Paper.


- Fold rectangle in half, meeting short edges.

- On the lower edge fold, using a 6-1/2″ x 6-1/2″ Square Rotary Cutter Ruler, mark and cut out a rectangle measuring 2-1/2″ wide and 2-1/4″ tall.

- Repeat on both lower corners. The cutouts will later form gussets at tote bottom.

- Open pattern flat and cut away 2″ across one short edge—this will be the tote front. Mark “Front” on paper pattern at upper center front.

Cut Fabrics
- Cut fabric, interfacing, and batting:
- Cut one 15″ x 28″ rectangle from outer tote fabric.

- Using a Rotary Cutter, Ruler, and Mat, cut three 3-3/4″ crosswise fabric strips from outer tote fabric for straps.

- Cut one 13″ x 15″ rectangle from contrasting pocket fabric.

- Cut one 15″ x 28″ rectangle and one 13″ x 15″ rectangle from Pellon Sof-Shape Interfacing.


- Cut one 15″ x 28″ rectangle from Pellon Insul-Fleece Batting.


- Cut one 15″ x 28″ rectangle from Pellon Silver Lining Insul-Film.


- Cut one 4″ x 9″ rectangle from Pellon Decovil One-Sided Fusible Stabilizer.


Assemble Insulated Lunch Tote
- Following manufacturer’s instructions, press 15″ x 28″ interfacing rectangle and 13″ x 15″ interfacing rectangle to back of 15″ x 28″ outer tote fabric rectangle and 13″ x 15″ contrasting pocket fabric rectangle.


- Using paper pattern, cut one each from: outer tote fabric, Pellon Sof-Shape Interfacing, Pellon Insul-Fleece Batting, and Pellon Silver Lining Insul-Film .

- Layer outer tote fabric, right side up, onto Pellon Insul-Fleece Batting, and set other layer to the side. Use Clover’s Wonder Clips t0 clip layers together around all outside edges.


- At the sewing machine insert a Schmetz Size 90 Jeans/Denim Needles, and attach a Roller Presser Foot or Non-Stick Presser Foot. Baste around all outer tote edges with a scant 1/4″ seam allowance. Set aside.


 A scant 1/4″ seam is slightly smaller than a 1/4″ seam. Use scant 1/4″ seams for basting the layers together. When the Insulated Lunch Tote is later seamed together, use actual 1/4″ seams—and basting stitches will be hidden within seam allowances.
- Fold pocket, meeting 15″ long edges, right sides together. Pin or Wonder Clip.

- Stitch, joining 15″ long edges and leaving short ends open.

- Press seam open on a Seam Stick, because of its smaller radius, using a Seam Stick avoids seam imprints when pressing seams open or to one side.

- Turn pocket right side out. Parallel to tote top, place and align pocket on tote front, with folded edge of pocket 2-1/2″ down from top edge. Pin or Wonder Clip.

- Stitch pocket to tote at sides, and across lower pocket edge using a 2.5mm stitch length.

- Using a 6″ x 24″ Rotary Cutting Ruler, and Clover’s Chaco Liner, mark vertical center of the tote.

- Mark handle placement lines 3″ on each side of marked center.


- Position Clover’s Double Sided Basting Tape, 1/8″ inside marked lines, at 3-1/2″ below back tote top – to pocket top edge.


- Finger press Clover’s Double Sided Basting Tape in place. Set aside.
Create 1″ Straps
- Pin short ends of the three 3-3/4″ crosswise fabric strips, right sides together.

- Stitch short ends of the two 3-3/4″ crosswise fabric strips, right sides together.

- Press seam open.

Use a Clover’s 2″ Bias Tape Maker, Clover’s Straight Tailor’s Awl, and iron to create tote straps.
- Insert seamed fabric strip into the Clover’s 2″ Bias Tape Maker using Clover’s Straight Tailor’s Awl to advance strip.

- Press the folded fabric strip as you pull the bias tape maker.

Pin fabric strip end to ironing board to secure fabric.


- Using a Rotary Cutter, Ruler, and Mat, trim strap to approximately 80″.

- Seam short ends to form a continuous loop.

- Press seam open. Repress folded edges.

- Fold strap, wrong sides together, meeting long edges to form 1″ strap. Press.

- Edgestitch along both long strap edges.

- Fold strap in half and place pins at half markings.


- Remove paper backing from Clover’s Double Sided Basting Tape.
- Align pins on strap to tote bottom center and finger-press straps in place on Double-Sided Basting Tape.

Place pins on straps — at 3-1/2″ down from top edge of tote back, and at top pocket edge — as a reminder not to stitch past this point!
- Stitch strap to tote along previously stitched lines, pivoting at pocket top and 3-1/2″ below upper back tote (where you placed the pins as a reminder).

- Place and center 4″ x 9″ Pellon Decovil One-Sided Fusible Stabilizer rectangle to wrong side of tote bottom. Using an EZ View Press Cloth, press and fuse 4″ x 9″ Pellon Decovil One-Sided Fusible Stabilizer rectangle into place following manufacturer’s instructions.


- Carefully layer Pellon Silver Lining Insul-Film to back of tote layers. Use Clover’s Wonder Clips to clip layers together around all outside edges.

Be sure to NOT catch tote handles within the basting stitches, Deanna suggests folding the handles to the center of the tote when attaching the Pellon Silver Lining Insul-Film available at Nancy Zieman Productions at ShopNZP.com to the back of the tote layers!
- Baste stitch around all outside edges using a scant 1/4″ seam.


 The secret to the Easiest-ever Zipper Technique is to start with a zipper length longer than needed! The longer zipper length provides “handles” to hold while stitching. Plus, the zipper is stitched to the tote using flat construction methods.
- Start with a 18″ or longer handbag, tote, or jacket zipper.

- On wrong side of zipper, mark a 15″ section in center of zipper.

- With right sides together, place zipper tape edge to top tote front. Clip with Clover’s Wonder Clips.

- Straight-stitch zipper in place, using a zipper foot.

- With right sides together, place remaining zipper tape to top tote back. Clip with Clover’s Wonder Clips. Stitch.

- With right sides together, meet tote sides, aligning bottom edges. Note: In step one, above, 2″ was trimmed away from the tote front, now zipper will naturally fall into position on the upper tote front.
Open zipper before stitching side seams!
- Stitch side seams, using caution when stitching over zipper teeth.

- Bar tack zipper ends, 1/4″ inside tote edges.

A bar tack is a wide zigzag stitch, with little or no stitch length. Set sewing machine for a wide zigzag stitch, set length at zero (or the minimum number) and zigzag over zipper teeth, joining the two zipper tapes into one closed-end zipper.
- Trim away excess zipper tape with a craft scissors.

- Meet lower tote gusset seams. Stitch.


- Repeat for opposite gusset seam.
- Turn Insulated Lunch Tote right side out and enjoy!
Then, head over to ShopNZP.com and purchase one or both of our exclusive Cooler Grocery Tote Bundle Box! and Insulated Lunch Tote Bundle Box The Cooler Grocery Tote Bundle Box and Insulated Lunch Tote Bundle Box feature Wildflower Boutique Fabrics by Riley Blake Designs, Pellon Sof-Shape, Insul-Fleece, Insul-Film, zipper, and our Exclusive Cooler Grocery Tote & Insulated Lunch Tote Pattern – with Classic Timesaving Tips by Nancy Zieman. The Cooler Grocery Tote Bundle Box and Insulated Lunch Tote Bundle Box include everything you’ll need to make one Cooler Grocery Tote and one Insulated Lunch Tote—you’ll supply the thread.

Related Posts

Sew a Cooler Grocery Tote! This stylish insulate should tote features front pockets, self-fabric handles and works great for an afternoon picnic, or for picking up a few groceries. The sewing is streamlined with simple pattern shapes made from a rectangle and our easiest-ever Zipper Technique! Our Cooler Grocery Tote sewing tutorial features Insul-Fleece and Insul-Film on the inside!

Make our NEW! Wrap It Up! Casserole Carrier with simple fabric rectangles and Nancy Zieman’s Wrapped Corner technique! NEW! Wrap It Up! Casserole Carriers are ideal projects for beginner sewers!

Stitch our No-Hassle Towel Topper in just two hours with our step-by-step sewing tutorial–below! Finished No-Hassle Towel Topper measures approximately 7-1/2″ x 20″. Sew this super-quick No Hassle Towel Topper with two fat quarters and a coordinating kitchen towel! We’re using Wildflower Boutique Fabrics! Showcase your kitchen style and hang this handy towel in your home, or RV. You’ll always know where your hand towel is hanging out!

Sew four different coordinating 16″ Dinner Napkins with just two yards of Fabric! Wait! What? “Four different napkins” from “two yards of fabric?” You may be thinking, “how’d they do that?” We share our secret sewing tips in the No-Hassle Napkin Sewing Tutorial.

Stitch our No-Hassle Table Topper in just two hours with our step-by-step sewing tutorial–below! Finished Table Topper measures approximately 14″ x 38″. Sew this super-quick Table Topper with one-half yard each of two coordinating fabrics! We’re using NEW! Wildflower Boutique Fabrics!

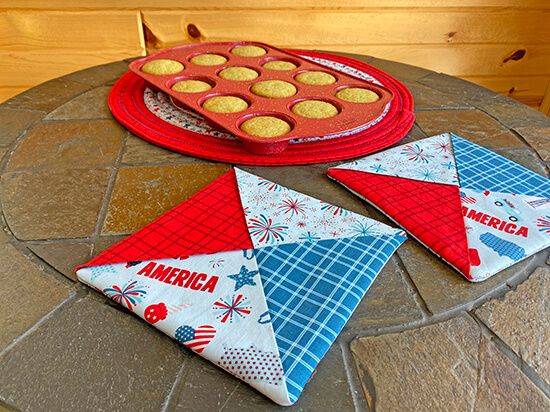
Make our Potholder Plus in just two hours with our easy step-by-step sewing tutorial–below! Our Potholder Plus features a pocket that’s ideal for holding a baking mix & wooden spoon, and giving as a gift! Finished Potholder Plus measures approx. 8-1/2″ x 9-1/2″. Our Potholder Plus sewing tutorial includes bias binding tips!

Welcome spring and sew a new Easter Table Mat! We’re stitching our Easter-themed project with Jerry’s Jellyroll Jig and NEW! Easter Egg Hunt Fat Quarter Pack by Natàlia Juan Abelló for Riley Blake Designs! The sewing is fun and the finished Table Mat provides a festive table decoration!
Exclusive Insulated Lunch Tote Bundle Box available at ShopNZP.com! The NEW! Insulated Lunch Tote Bundle Box features Wildflower Boutique Fabrics by Riley Blake Designs, Pellon Sof-Shape, Insul-Fleece, Insul-Film, zipper, and our Exclusive Cooler Grocery Tote & Insulated Lunch Tote Pattern – with Classic Timesaving Tips by Nancy Zieman. The NEW! Insulated Lunch Tote Bundle Box include everything you’ll need to make one Insulated Lunch Tote—you’ll supply the thread.

Shop NEW! Exclusive Bundle Boxes at ShopNZP.com

Shop Clover Tools & Sewing Supplies at ShopNZP.com!

Shop Pellon Interfacing & Supplies at ShopNZP.com!


Shop NEW! Riley Blake Quilting Precuts and Fat Quarter Bundle Boxes on SALE at ShopNZP.com

Happy National Quilting Month from ShopNZP.com!


For a chance to be the random winner of a Stitch it! Sisters 5″ Short Stack with S!S button & sticker, please leave a comment below sharing your favorite location to picnic?
Nancy Zieman Productions will give away one Stitch it! Sisters 5″ Short Stack with S!S button & sticker to one US resident in the 48 contiguous states. Winner must reply withing 30 days to the official giveaway announcement email message – sent from Nancy Zieman Productions.
![]()
Join the NEW! 2021 Nancy Zieman Productions Pillow Sewing Challenge this March at the NZP Blog! Deadline to enter is Thursday, March 25, 2021.
![]()
Happy Sewing!
Team Nancy Zieman
Nancy Zieman Productions. LLC.
Stitch it! Sisters is a production of NZ Productions LLC. Content in this feed is © copyright 2021 by Nancy Zieman Productions, LLC and may not be republished without written permission. You’re welcome to forward the email to a friend or colleague but it’s not okay to add the RSS feed automatically as content on a blog or other website. The FTC requires us to tell you that Nancy Zieman Productions, LLC has provided products by other companies in the course of doing business. The FTC requires us to advise you to take this information into consideration when reading this posting.


Karen L
What a cute but also practical bag. It’s so much cheaper to carry your lunch wherever you go and only eat out occasional. Makes the eating out special that way. Also you can regulate what you are eating and stay healthier. Thanks so much for this tutorial. Keep those great patterns coming stitch-it-sisters.
CLOVIS
Haven’t been on a picnic in a long time. The lunch bag is great for keeping your food hot/cold.
Shirl Carter
I love the picnic tote bag. It’s not where I like to go to have a picnic, but who I take with me on the picnic. My precious grand daughter and I would have so much fun laying on a quilt and just enjoying each other’s company. We would, of course, pack lots of snacks and juices.
Cynthia Huggins
Our family’s favorite picnic spot is Rifle Falls in beautiful Colorado! The best picnics are when all of our Colorado family is together. The picnic tote would be a wonderful addition for our lunches
Vivian
We’ve recently moved to a new area & are exploring local parks. I think my favorite picnic spot so far would be Mt. Magazine National Park. Thanks for all your great projects!
Cynthia
My favorite place to picnic is wherever we are fishing. We take all our picnic supplies in the boat and eat on the water..
Julie K
My favorite place to picnic is my husbands parents old farmsite! Huge Old Trees dancing in the wind, lots of bunnies and peaceful!
I have a favorite old quilt that my grandmother made to put down on the grass,
Dixie
My favorite place to have a picnic is in Wheatland Wyo. by the lake.