

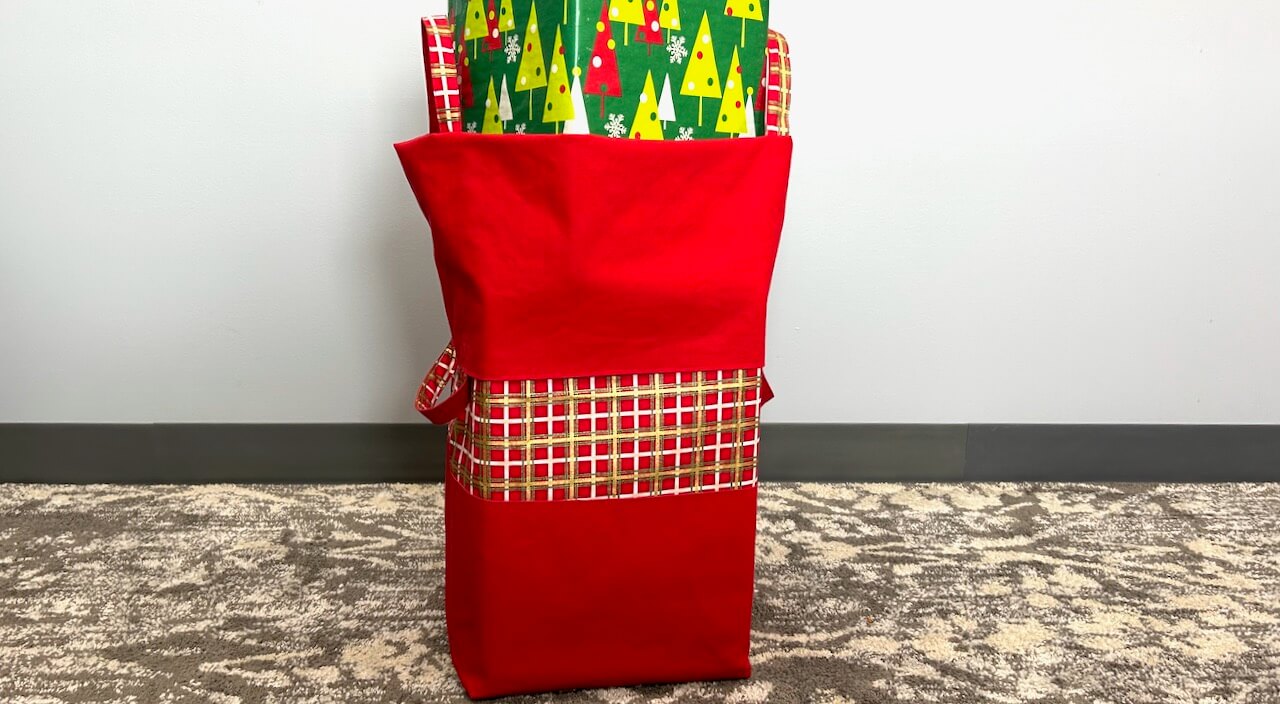
Fun Fabric Caddy Sewing Tutorial and NEW! Wildflower Boutique Fabric Caddy Bundle Boxes at ShopNZP.com

Organize your sewing area in style, with Team NZP’s Fun Fabric Caddy! Sew our Fun Fabric Caddy in four hours – and tidy your sewing space — or use in any room of your home. We’ve made our Fun Fabric Caddy with two coordinating Wildflower Boutique Fabrics and Pellon ShirTailor Interfacing. The sewing is easy with just a few fabric rectangles and squares. Plus, pattern includes instructions for our Fabric Bin made from four 10″ fabric squares! In a couple evenings of sewing, you’ll have a unique fabric caddy & fabric bin set – that also make great gifts!


Watch Stitch it! Sisters Program 110: Fun Fabric Caddy
Watch Stitch it! Sisters Program 110: Fun Fabric Caddy Video with hosts Deanna Springer and Dana Casey. In this video, the Stitch it! Sisters share step-by-step fabric cutting and sewing techniques for making Team NZP’s Fun Fabric Caddy with our Fun Fabric Caddy Pattern. Organize your sewing space – or serve iced tea in style!
 Then, head over to ShopNZP.com and choose from four exclusive NEW! Fun Fabric Caddy Bundle Boxes designed by the Stitch it! Sisters! Our NEW! Fun Fabric Caddy Bundle Boxes feature, Wildflower Boutique Fabrics! by Riley Blake Designs. The NEW! Fun Fabric Caddy Bundle Boxes include ALL SUPPLIES needed to make one Fun Fabric Caddy and Fun Fabric Bin! You’ll supply the thread.

Fun Fabric Caddy Bundle Box – Green & Teal available now at ShopNZP.com!


Fun Fabric Caddy Bundle Box – Green & Green available now at ShopNZP.com!

Fun Fabric Caddy Bundle Box – Green & Yellow available now at ShopNZP.com!


Fun Fabric Caddy Sewing Tutorial
Approximate finished size: 7″ W x 8″ D x 12″ H
Fun Fabric Caddy Tools & Supplies
- NEW! Wildflower Boutique Fun Fabric Caddy & Fun Fabric Bin Bundle Box
- Clover’s Rotary Cutter & Mat, and ruler
- Clover’s Bordeaux Scissors
- June Tailor’s Eze-View Pressing Cloth
- Pattern Making Paper
- Clover’s Chaco Liner
- Flower Head Pins
- Schmetz Universal Size 80 Needle
- 45mm rotary cutter with pinking blade
- Clover’s Point 2 Point Turner
- Clover’s Supersize 5-in-1 Sliding Gauge
- Clover’s Hot Ruler
- Seam Stick
- Clover’s Rainbow Wonder Clips
- I Sew For Fun Hand-Sewing Needles with Heart-Shaped Case
- The Big Jig
- June Tailor’s® Starch Savvy

 Pre-shrink coordinating fabrics by steaming and pressing, and steaming and pressing a second time, and then spray press and starch fabric with June Tailor’s Quilter’s Starch Savvy — press and starch, press and starch.
Fun Fabric Caddy FREE! Sewing Tutorial
Prepare Fabrics from NEW! Fun Fabric Caddy Bundle Box. We’re featuring the NEW! Wildflower Boutique Green Floral and Teal Vine Bundle Box.

Sew our Fun Fabric Caddy with our easiest ever sewing techniques, and Classic Timesaving Tips by Nancy Zieman, and see how using the right tools makes the sewing process enjoyable – even for beginners!
Make Fun Fabric Caddy Patterns:
- Using our Pattern Making Paper, trace and create, and cut out the Fun Fabric Caddy Side/Handle Pattern pattern piece from our Fun Fabric Caddy Pattern. Label pattern piece accordingly and transfer markings and dots to paper pattern.


 Streamline the pattern making process and opt to cut simple rectangles from fabric and interfacing, and skip making the rectangle Caddy Front/Back and Caddy Divider paper pattern pieces below!
- Using Pattern Making Paper, create and cut out one 7-1/2″ x 20″ rectangle for Fun Fabric Caddy Front/Back Pattern, and one 8-1/2″ x 9-1/2″ rectangle for Caddy Dividers Pattern. Or opt to cut simple rectangles from fabric and interfacing, and skip making these two rectangle paper pattern pieces.

- Cut one 8-1/2″ x 28″ rectangle from outer Caddy fabric for Fun Fabric Caddy Side/Handle.

- Cut one 7-1/2″ x 20″ rectangle from outer Caddy fabric for Fun Fabric Caddy Front/Back.

- Cut one 8-1/2″ x 28″ rectangle from inner Caddy contrast fabric for Fun Fabric Caddy Side/Handle.

- Cut one 7-1/2″ x 20″ rectangle from inner Caddy contrast fabric for Fun Fabric Caddy Front/Back.

- Cut two 8-1/2″ x 9-1/2″ rectangles from inner Caddy contrast fabric for Caddy Dividers.

- Cut two 8-1/2″ x 28″ rectangles from Pellon ShirTailor for Fun Fabric Caddy Side/Handle.

- Cut two 7-1/2″ x 20″ rectangles from Pellon ShirTailor for Fun Fabric Caddy Front/Back.

- Cut two 8-1/2″ x 9-1/2″ rectangles from Pellon ShirTailor for Caddy Dividers Pattern.


- Cut one 6-1/2″ x 6-1/2″ square from Pellon Peltex One-Sided Fusible Ultra Firm Stabilizer for inner Caddy.


Easily press interfacing to in place with the help of a Spray Mist Bottle–filled with water, and be sure to use an Eze-View Pressing Cloth!

Press Interfacing to Fabric Pieces:
- Following manufactures instructions, press Pellon ShirTailor interfacing rectangles to back of companion fabric rectangles.

- Using Fun Fabric Caddy Side/Handle Pattern and Clover’s Chaco Liner, trace and cut out fabric Caddy Side/Handle from two 8-1/2″ x 28″ interfaced fabrics, and transfer lower dots to right side of fabric pieces.
Be sure to position the paper pattern on fabric top folds, for Caddy Side/Handle pieces.


- Using a Schmetz Universal Size 80 Needle, stitch curved handle seams. Press seams flat.


- Grade/notch inner curved seams using a scissors or a 45mm rotary cutter with pinking blade.

Use a rotary cutter with pinking blade to grade and notch inner curved seams quickly and easily.
- Using Clover’s Point 2 Point Turner, turn Fun Fabric Caddy Side/Handle right side out. Press. Baste around sides and lower edges with scant 1/4″ seams. Set aside. Optional: Edgestitch Fun Fabric Caddy Side/Handle curved edges.


- Press.

- Baste around sides and lower edges with scant 1/4″ seams. Set aside. Optional: Edgestitch Fun Fabric Caddy Side/Handle curved edges.

A scant 1/4″ seam is slightly smaller than a 1/4″ seam. Use scant 1/4″ seams for basting the layers together. When the Fun Fabric Caddy is later seamed together, use actual 1/4″ seams — and basting stitches will be hidden within seam allowances. OPTIONAL: Topstitch around all edges for a decorative accent!
- With Clover’s Supersize 5-in-1 Sliding Gauge, position and center 6-1/2″ x 6-1/2″ Pellon Peltex square to center wrong side of inner Fun Fabric Caddy Front/Back. Using June Tailor’s® Eze-View Pressing Cloth, press and fuse Peltex into place following manufacturer’s instructions.


- Place outer and inner Fun Fabric Caddy Front/Back right sides together. Wonder Clip/pin.


- Stitch seams, joining 7-1/2″ short ends of Fun Fabric Caddy Front/Back, leaving long edges open. Press seams open.


- Turn Fun Fabric Caddy Front/Back right side out. Press. Baste long edges with scant 1/4″ seams. OPTIONAL: Topstitch around all for edges for a decorative accent!

- Using Clover’s Chaco Liner and Clover’s Supersize 5-in-1 Sliding Gauge, place a mark within each seam allowance, 5-1/2″ down from Fun Fabric Caddy Front/Back narrow edge. With scissors, clip at mark to basting line, as shown. Repeat making a total of four clips within seam allowances. Set aside.


- Using Clover’s Hot Ruler, press under 1/2″ at both 8-1/2″ short ends of one Fun Fabric Caddy Center Divider.


- Fold Fun Fabric Caddy Center Divider, right sides together, meeting 9-1/2″ long edges.
- Stitch seam, joining 9-1/2″ long edges, leaving short ends open.

- Press seam open over a Seam Stick. Turn right side out. Press.

- Baste short ends closed with scant 1/4″ seams. OPTIONAL: Topstitch around all edges for a decorative accent!
 Easily press Caddy Center Divider seams open using a Seam Stick placed on top a sleeve board.
- Using Clover’s Chaco Liner and Clover’s Supersize 5-in-1 Sliding Gauge, mark center vertical line on both front and back of Fun Fabric Caddy Center Divider.

- Repeat steps above for remaining Fun Fabric Caddy Center Divider. Set aside.
You’re the designer! There is no right or wrong side to the Caddy Front/Back. Choose to have the contrast fabric facing outward or choose to have the outer fabric showing on the outside for a unified look.- Using Clover’s Chaco Liner and Clover’s Supersize 5-in-1 Sliding Gauge, place a 4″ long marked line at center Inner Fun Fabric Caddy Side/Handle, at 1″ below upper side edge, as shown.
- Repeat marking a 4″ long center line on opposite end of Inner Fun Fabric Caddy Side/Handle.

- Using Clover’s Chaco Liner and Clover’s Supersize 5-in-1 Sliding Gauge, starting at 1″ below upper side edge, mark a 4″ long center line on Inner (dark fabric side) Fun Fabric Caddy Side/Handle, as shown below.
- Repeat marking a 4″ long center line on opposite end of Inner (dark fabric side) Fun Fabric Caddy Side/Handle. Set aside.

- Position and pin the folded narrow end of one Fun Fabric Caddy Center Divider to one of the marked lines on Inner Fun Fabric Caddy Side/Handle, as shown.

- Topstitch inner Fun Fabric Caddy Center Divider to Inner Fun Fabric Caddy Side/Handle along basting stitches.
- Repeat steps above and attach remaining Fun Fabric Caddy Center Divider to opposite end of Inner Fun Fabric Caddy Side/Handle, as shown.

 If you’re using both dark and light fabrics, opt to use clear monofilament thread in the top and bobbin — when stitching Caddy Center Dividers in place.
- Position and pin one folded narrow end of one Fun Fabric Caddy Center Divider to marked line on Inner Fun Fabric Caddy Front/Back, as shown.

- Topstitch Inner Fun Fabric Caddy Center Divider to Inner Fun Fabric Caddy Front/Back along basting stitches.

- Fold opposite end of Inner fun Fabric Caddy Side/Handle over Fun Fabric Caddy Front/Back, aligning unsewn seams, as shown. Pin.

- Repeat steps above and stitch/attach opposite Fun Fabric Caddy Center Divider to opposite end of Inner fun Fabric Caddy Center Divider, as shown.

- Fold one Fun Fabric Caddy Center Divider in half, meeting Fun Fabric Caddy Side/Handle to Fun Fabric Caddy Center Divider, right sides together, as shown. Wonder Clip.

 Move Center Dividers up out of the way before stitching Caddy seams, as shown.
- With Fun Fabric Caddy Side/Handle facing up/toward you, stitch Fun Fabric Caddy Side/Handle to Fun Fabric Caddy Front/Back, stopping with needle down and pivoting at dots on lower Fun Fabric Caddy Side/Handle.
Stitch Center Dividers in place with the help of The Big Jig, and keep your presser fool level when stitching through multiple fabric layers.
- Repeat steps placing and stitching remaining Fun Fabric Caddy Side/Handle to remaining Caddy Front/Back.

- Using a 45mm rotary cutter with pinking blade, trim seam allowances to prevent fabric edges from raveling.

- Using Clover’s Point 2 Point Turner, turn Fun Fabric Caddy right sides out. Press.

- Align Fun Fabric Caddy Center Dividers at center line markings, forming four equal sections. Pin.
- With Hand Sewing Needle and thread, stitch Fun Fabric Caddy Center Dividers together at center markings.


Make a coordinating Fun Fabric Bin with instructions included in our Fun Fabric Caddy & Fun Fabric Bin Pattern

Green Wildflower Boutique Fun Fabric Caddy & Fun Fabric Bin Bundle Box
Green & Teal Wildflower Boutique Fun Fabric Caddy & Fun Fabric Bin Bundle Box
Green & Yellow Wildflower Boutique Fun Fabric Caddy & Fun Fabric Bin Bundle Box

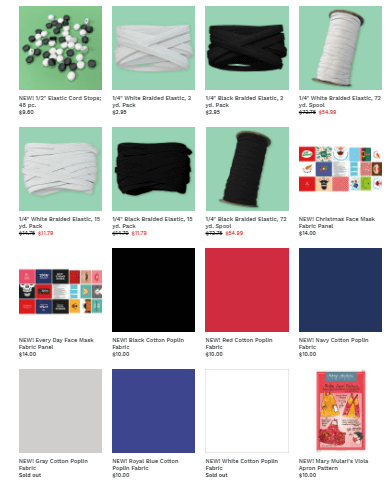
Shop Fabric Face Coverings Supplies at ShopNZP.com
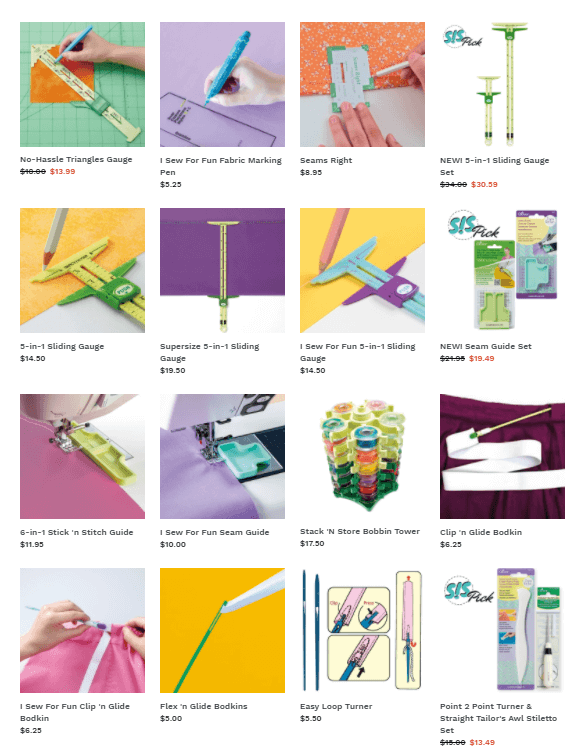
Shop Clover Tools & Sewing Supplies at shopnzp.com!
Shop Pellon Interfacing & Supplies at shopnzp.com!

Shop Schmetz Sewing Machine Needles at shopnzp.com!

 Showcase your sewing, quilting, and/or machine embroidery talents! The Nancy Zieman Productions Team is excited to announce our 2021 Viewer’s Showcase, taking place February 1–28, 2021! You’re invited to submit up to five different project photo(s) of project(s) you’ve been making from one or more of Team NZP’s Books, Patterns, Tools, Videos, and/or Blog Tutorials. Team NZP will share project photos in an upcoming March Viewer’s Showcase posting on The Nancy Zieman Productions Blog. Email hi-res photo(s) along with your name and hometown city and state to [email protected], by February 28, 2021. You could win one of the 2021 Viewer’s Showcase Giveaways valued at over $200!

For a chance to be the random winner of a Clover’s Chaco Liner, from Clover, please leave a comment below sharing where you’d use your Fun Fabric Caddy!
Clover will give away one Chaco Liner, to one US resident in the 48 contiguous states. Winner must reply within 30 days to the official giveaway announcement email message sent from Nancy Zieman Productions.

The randomly selected winner of a Stitch it! Sisters 5″ Fabric Short Stack with S!S button & sticker, from the January 28 Blog Post, NEW! Valentine’s Day Wine Tote Sewing Tutorial, is Livivua Chandler.

Her comment is: I am in love with making pillows and aprons. I love personalizing them and putting on that extra touch for my friends and family. They love the ruffles.
Happy Sewing!
Team Nancy Zieman
Nancy Zieman Productions. LLC.

Stitch it! Sisters is a production of NZ Productions LLC. Content in this feed is © copyright 2021 by Nancy Zieman Productions, LLC and may not be republished without written permission. You’re welcome to forward the email to a friend or colleague but it’s not okay to add the RSS feed automatically as content on a blog or other website. The FTC requires us to tell you that Nancy Zieman Productions, LLC has provided products by other companies in the course of doing business. The FTC requires us to advise you to take this information into consideration when reading this posting.


BevM
The Fun Fabric Caddy would be very handy to carry supplies from my sewing studio to my recliner in the family room where I finish up hand sewing.
Carolyn T
My “everything” room (for sewing, crafting, Zoom-ing, PC-ing) will see this new fabric caddy filled with sewing tools. It has the cuteness and height needed to keep essentials nearby.
Karen K
During the last 10 months, I have made a full coordinating set of fabric baskets and bins similar to the Fun Fabric Caddy and Bin. I’ll be adding these to my set also!
Joyce
I would use the Fun Fabric Caddy to transport my sewing tools to the dining room when cutting patterns, and for transporting my paper crafting tools when I am creating projects in a room other than my crafting/sewing room.
Deb
I would use the Fun Fabric Caddy to store sewing and embroidery tools.
Shirley Carter
The Fun fabric caddy would be perfect to carry my tools to the couch in front of the TV, where I sit to do my hand sewing while watching and listening to TV. Thanks, Stitich it Sisters for your pattern and tutorial.
Karen L
The Stitch-it-Sisters always seem to have such great projects for us to make and they are often needed by sewers. This caddy is a perfect example. Love it and the fabrics shown.
Sandra
Fabric caddy and sewing bins would be great items to make and use in sewing room. Love the patterns for these and the laundry type bag that the Sister’s are showing us. Would love to try these type of markers out.
Susan
Would use the Fun Fabric Caddy right on my sewing table to store my quilt clips so that I can toss them in the caddy as I sew.
Dixie
I would use the fabric caddy for my embroidery tools. Also one to have by my sewing machine to keep sewing tools in.
Clovis
The caddy would be used to hold the notions you use the most.
Lorraine Alves
First caddy would be a gift for my sister-in-law. It would be a perfect addition to her in home hair salon. She has many odds and ends including curlers, clips and brushes and combs. that would store nicely in the caddy.
Stef
I would like to make the non-handles fabric bin (little one). Where can I find the instructions for this project? Than you!