
Quilt Binding in Six Easy Steps
 A narrow strip of fusible interfacing is the secret to fearlessly binding the edges of a quilt in six easy steps. In the past, it was a trick for us to join the beginning and ending of the quilt binding. Not any more! We hope that you will enjoy this sewing tutorial on quilt binding.
Donna Fenske came up with this idea. Her innovative process is one of the techniques in this week’s Sewing With Nancy featured online video. It’s the last of the three-part series, Fearless Quilting Finishes. During this 30-minute show you’ll learn assorted quilt binding finishes. Watch the process online for all the details.

Here’s how to sew a quilt binding
Step One: Prepare the binding strips
- Cut one end of the binding with a 45-degree angle. Press in 1/4″ at the beginning angled edge.
- Press a 1/4″ strip of fusible tape on top of the folded inner edge.

Step Two: Press the binding
- Fold and press the binding in half, wrong sides together, meeting lengthwise edges.
Step Three: Stitch the binding to the quilt
- Stitch the binding to the quilt with a 1/4″ seam, starting about 4″ from the end of the binding. (See the white thread at the far right of the photo!)

- Nancy details how to fold and stitch the binding at the corners. Remember, you can watch on Public TV!

Step four: Fuse the quilt binding ends together
- Remove the paper backing from the fusible web.

- When the binding reaches the starting point, tuck the end of the binding into the beginning.
- Trim off the excess binding, if there is any.

- With the binding end sandwiched between the starting point, press. The bias seam is secured without stitching.

- Next, continue to stitch the remaining 1/4″ seam.

Step five: Turn the binding to the wrong side
- Press the binding up.

- Wrap and pin the binding to the wrong side, covering the stitching line.

Step six: Stitch the final time
- Stitch in the ditch, sewing in the well of the seam.

- Or, hand stitch the folded edges, stitching on the wrong side of the fabric. (We’ve obviously used another sample.)

There’s more to learn online or read in the Fearless Quilting Finishes book!
If the corners of your quilting project are hexagon or octagon shaped, learn the tips on how to add binding to easily finish those edges. Also learn how to add binding to curves.
Did you catch the first two episodes of Fearless Quilting Finishes?
Watch episode one and episode two online.
Here’s a reference to have close at hand.
All the information shown in the three-part series is written and illustrated in Nancy’s book, Fearless Quilting Finishes. The Sewing With Nancy staff made certain that all the steps were carefully written and illustrated. Presenting sewing and quilting techniques is a team effort!
Happy Quilting!
Team Nancy Zieman
Nancy Zieman Productions, LLC.
![]()


Laura L Smith
This is a very handy technique to know. So much easier than twisting and turning to sew the two 45 degree angles together. I like to sew my bindings on by machine.
Shirley
I sew bindings on by machine. I absolutely love the idea above. That has been the hardest part for me and I can’t wait to try this!
nancyB
I love this fusible technique along with the rest of the folded edge and stitch in the ditch! THANKS
Susan B
love your method I use plastic shirt clips to hold it in place while I sew it down
Eileen Weller
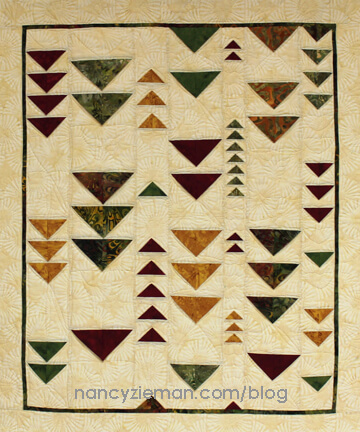
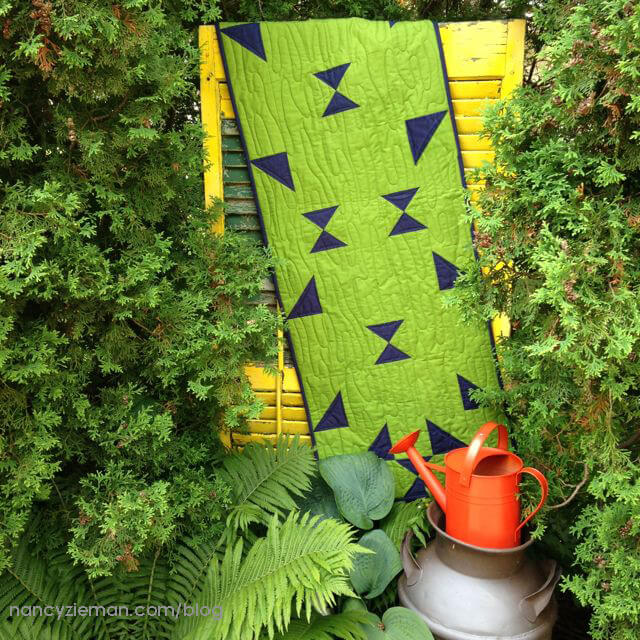
Easy way to hold it all in place. I only have two hands! My favorite border is a scrappy flying geese motif.
Janis
I like piano key borders.
Becky Collis
Favorite border technique? Getting them cut and sewn on correctly!!! LOL!
Shaela forbes
Suspect that this may become my favourite way to finish binding!
Carole M
i like the double folded binding and stitching down on the back. If I can get me hands on some fusible interfacing I may try this method
Enid
I like that method. Sewing the two 45 degree together is a pain.
Carol Pollock
My favorite borders are ones that are sewn right with the block or at the beginning or end of the row. Simple!
Sheila
I like to hand stitch the folded edges. It gives me a chance to reflect on the quilt project and also feel as if I have connected with the past generations in my family who quilted by hand.
Linda E in AZ
Looks like a great tip, so I’ll have to try it. Thanks for the chance to own this interesting sounding book!
cbfanger
First I stitch my binding to the back of the quilt. Press the
binding to the front of the quilt. Then with a decorative stitch
top stitch the binding on the front. This is easier for me than stitching in the ditch and adds a little artistic flair.
Linda Palmer Livingston
So far, I like to machine stitch in the ditch binding.
Marilyn Logan
I always hand stitch the binding as a final touch of love put into all my quilts. I usually prefer to do this step during the cold winter weather.
Pat
The binding technique illustrated here has now become my favorite. This is truly simple and clever! It’s one of those ideas you wonder why you didn’t think of yourself. Thanks so much for this information and for a chance to win you Fearless Quilting Finishes book.
Cindy Wienstroer
I like straight edges – sew straight strips (double fold wrong sides together) 1/4 from front side edges, turn to back and hand stitch. Then come back and do the same with top & bottom edges. It does make a little bit bulkier corner but is easy to do and can watch TV while doing it – meditative in a way.
Delaine
What a great idea! My favorite border technique is to put a 1″ border and then a final 3 – 4″ border. Thanks!
Pat H
Thanks for the great binding technique – and all of your great advice! I always manage to struggle in joining my binding using other methods. I know this method will work for me!
Bonnye
I am confused. Did you want border technique as written or binding technique. Border technique: I measure the quilt in the middle and cut the borders from that measurement. Binding technique: I like a bias binding.
Sandra Hall
I am going to try this method on my next project. It sure would be an easier method on smaller projects like baby quilts or even place mats. Thanks for this blog — love it!
Kathy Harvey
My favorite is the fold down at the corners to miter, saw this years ago on the show and it has been such an ongoing help!
Mary B
I think this just became my new favorite!! I’ve always struggled with getting those two ends to look even decent, let alone good. Thanks for the tip!!!
Brenda Hanser
My favorite binding came from a Ricky Tims DVD. Sew a small covered cording down the middle of the binding. Fold in half with the cording on one side and the raw edges of the bindign on the other. Sew the binding raw edge to the back of the quilt with the cording raw edges on the top. Fold over to the front of the quilt and stitch in the ditch of the small cording. You can add amazing contrast by using different colors for the cording and the binding.
Kathy Luehrs
I love the piano keys – I did this on my first quilt and it is still my favorite
Phyllis
I like to hand stitch my bindings as the final step. I do it while watching television or just sitting outside on a nice day.
Shirley Clark
This is very neat! I love prairie points on some quilts because I can use a variety of the fabrics in the quilt.
kimberle
nancy thank you very much for the tip I’ll have to give this a try. My favorite way of binding at this time is using my binder foot attachment on my Bernina sewing machine buy sandwichIng my quilt in between the bias strips.
LoAnn
I am going to try this method. I like to hand stitch the binding to the back, BUT because most of my quilts are done for Comfort Quilters of Fairbanks, IN 47849 (we donate our quilts to disaster areas, homeless, families that their houses burnt, etc.) I prefer to completely sew binding by machine for faster results. Thank you for a chance to win this book.
Joyce
I learned that binding method in my first quilting class and have been using it since. They didn’t teach to use the fusible tape, great idea. I will try that. I enjoy doing borders using scraps left over from the quilt. Makes a very colorful border.
Jeanne
I like the piano keys I love the way it looks.
Judy Marketos
Thrilled to have a chance to win this book. Love your methods and looking forward to learning more.
Sue
I am intrigued with this method, the final match can be so cumbersome. My favorite finishing technique has been hand stitching, I am now ready to try stitching in the ditch since I am working on a huge quilt project
Nancy Thrift
Don’t know how to bind a quilt I was looking here to try to learn.
Jennifer F
I always use my binder buddy ruler to accurately and carefully cut the binding and then use lots of pins to hold it in place, finishing with hand stitching.
Maria Hart
That fold over binding is my all time favorite!
I love the idea of fusible tape to join the beginning to the end! There is one more step I would do…after fusing, trim the excess to “feel” like the rest of the pieced binding.
I am so happy to know you through your Saturday morning show.
LindaLu
Ha! I could have used this yesterday on a baby blanket. I haven’t been quilting very long and have only tried the plain edge binding.
Starla
This will help me conquer my fear of binding, I hope!
Carol K.
I love this technique! It is especially good to know for the non-90 degree angles! I have a quilt made by the Amish and that quilt binding isn’t mitered at the corners. They just finished each binding strip flush with the ends of the quilt so that was the way I had been finishing quilts. My other attempts at miters were pretty pitiful but getting better at least. This should really help! I do like to hand stitch the binding — I just love the neat clean look of the hand stitching!
Elizabeth Kuntz
The only binding I’ve ever done is the traditional one And I’ve always whip stitched it in place. I love your method.
Merry Greene
I can’t wait to try this technique. I have not been successful AT ALL in trying to do a miter by figuring out which ways to cut the angles and sew. This sounds foolproof!
BARBARA MERKLEY
FOLD OVER THE BINDING AFTER SEWING ONE SIDE, THEN HAND STITCH THE BACK SIDE
Anne Schafroth
Love this technique — going to try it on my next binding and it will be my new favorite!
Pam B
Hiya Nancy!!! I like to use various pieced borders, especially on plainer block quilts. They just add something to the quilt. Thanks for having the giveaway. Blessed be, hugs!!! Pam
pamspretties57 at gmail dot com
Cari-Ann K
This is a simple binding. I am going to try it with my next quilt and piano keys border and hand stitched binding.
Donna B
machine stitch in the ditch
Barbara Cummings
I love this technique for my quilts !!!!
Lori Morton
What a cool way! I have only done bindings that you sew one side..fold over & sew it down…on machine. Your idea is AWESOME!!! Thanks for chance to win theis Drawing! 🙂
chris jennings
Prairie points is the border I love to see on baby quilts finishes them beautifully
Lori Morton
What a cool way! I have only done bindings that you sew one side..fold over & sew it down…on machine. Your idea is AWESOME!!! Thanks for chance to win this Drawing! 🙂
Ola Norman
I like binding edges
Donna G.
I love piano key borders and this is my favorite binding technique!
Rosemary Rissler
I am binding my first quilt. This is a God send message. I will try it this week-end. Thank you so much. Rose
Yvonne
I love the seminole border…but am enthused about learning new borders!
Ell
My binding technique is similar to yours except for using the fusible tape. Thanks for the tip.
Elizabeth M
I have always had trouble finishing my bindings. I like how this looks so easy, I am looking forward to using this new technique
Savannagal
This was a fabulous tutorial. Thanks so much. I have never made a quilt, but really want to try. Your tutorials and shows are so helpful. If I ever make a quilt, I’ll surely use a technique I learned from Nancy!
Gayla
I love double borders that are mitered.
Ronda Halvorsen-Ferns
Thanks Nancy a good refresher, I am almost starting to enjoy the binding step in my quilts. Excited to try my binder feet for my Evie serger.
Maria R
i do the same technique as you without the fusible. Will have to try that next time.
Anne Z.
Thanks for your wonderful techniques. You are able to simplify tasks that can be challenging, such as attaching the ends of binding. My favorite border technique is to add piping, either single or double piping for visual interest.
Duane Wiley
I like to machine finish my bindings by attaching it first to the back side then pulling it to the front and stitching it along the edge of the binding to the front. No coming apart on my watch! I might also say that this binding is for quilts that get loved! Thanks for the chance to win. Sorry I missed you at Quilt Con!
cindy zellner
I am very picky about my edges. Too picky sometimes. I use y No Math Miter Template I ordered from you, and I absolutely love that thing! It makes it SO easy:) But I would like to try the interfacing now too. Thanks.
Colleen Krall
I finish my quilts just like this without the fusible. I finish my binding on the machine.
Janet Wiener
My favorite quilt border technique depends on the quilt. for some I use a coordinating fabric and sometimes use squares or strips of material from the quilt. I have not used fusible web when binding, but plan to next time I bind a quilt.
Kathy
I hate working on bindings, so my favorite quilt border technique is passing the quilt & binding to my sister-in-law & letting her work her magic.
Helen
When making a scrappy quilt, I like to use the various scraps from the the quilt in my binding. I love the idea of the fusible binding method. I will try that soon. I have learned so much from Nancy through the many years I have watched her shows.
Kim Harrington
Sometimes I sew my binding to the wrong side and then use a decorative stitch to stitch down the right side. I also sew a sleeve for hanging in when I sew the binding on.
Maureen
Thank you for this posting. I an new to quilting and have completed some tops but I have not worked up the courage to quilt or bind them yet. I just keep practicing free motion on scraps and now I will try binding my practice pieces!
Linda M.
Nancy, I like doing piano keys or adding prairie points to a border. Both are fun and give a totally different look. And I love this last version of how you put on and finished a binding. I’m going to try it on my next project!
Sue B
I’m not an experienced sewer, but I do like practicing techniques so I’ve ‘followed’ somewhat a pattern picture I liked and I’m at the end where I need to bind, so your tip and video will be my next lead. Should be interesting to see how it turns out for me! Thank you, Nancy, for all your great videos that we can watch and learn by. (and tv broadcasts)
Sue B
I’m not an experienced sewer, but I do like practicing techniques so I’ve ‘followed’ somewhat a pattern picture I liked and I’m at the end where I need to bind, so your tip and video will be my next lead. Should be interesting to see how it turns out for me! Thank you, Nancy, for all your great videos that we can watch and learn by. (and broadcasts)