

Quilt with an Embroidery Machine in Eight Easy Lessons
The art of quilting often combines techniques. Traditional quilts are frequently appliquéd, then pieced, and finally all the layers are quilted. If you have an embroidery machine, you can streamline the processes with the touch of a button—the brainchild of Nancy Zieman’s guest Eileen Roche. The quilting technique is practically hands free! Watch as Eileen shares the magic in quilting on part-one of Quilt with an Embroidery Machine in 8 Easy Lessons on this Sewing With Nancy series.
Easily learn the machine embroidery quilting process. There’s no reason to be intimidated. This easy process is presented from a beginner’s perspective and is broken down into eight easy lessons, including many useful tips and techniques for professional results, which are all included in this machine embroidery starter kit.

The kit includes:
- Quilt with an Embroidery Machine in 8 Easy Lessons book
- Quilt with an Embroidery Machine DVD
- Wonder Under
- Quilting Needles 80/12 and 90/14
- Print & Stick Target Paper
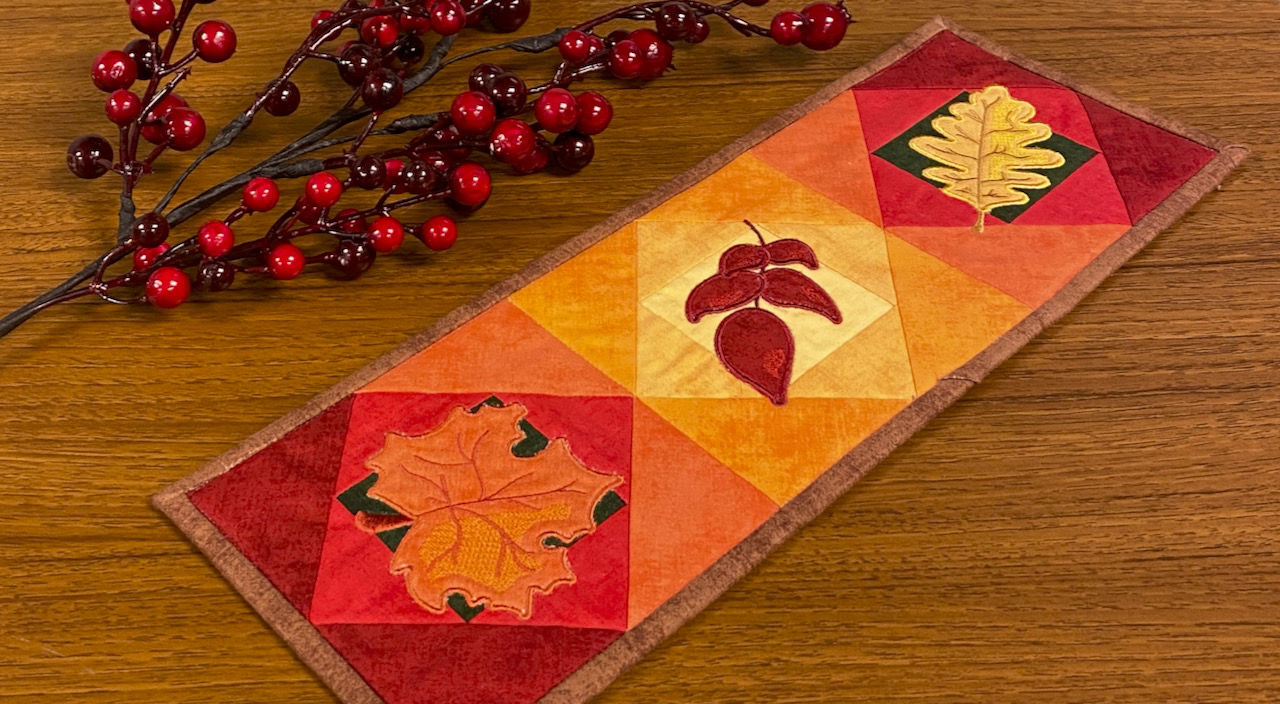
A machine that’s commonly used to create embroidery designs, is equally a quilting machine. Let’s start with a simple table topper, which features what at first glance is a complicated appliqué. You’ll soon see that the process is perfect for the novice quilter.
Prepare Quilt Sandwich
Like any method of quilting, we first must prepare a quilt sandwich. The quilt sandwich refers to the top, batting, and backing layers of the project. Eileen will show us how easy it is to prepare your sandwich for in-the-hoop quilting on this episode.
Embroidered Appliqué Designs
In the traditional appliquéd quilt process, you’ll create your project using these steps (in order):
- Appliqué
- Piece
- Quilt

Size and Variety
On the design CD included in the new Quilt with an Embroidery Machine in 8 Easy Lessons book, you’ll have the option to create projects in a variety of sizes including 6″, 7″, or 8″ quilt blocks. Choose a size that best suits your project dimensions.

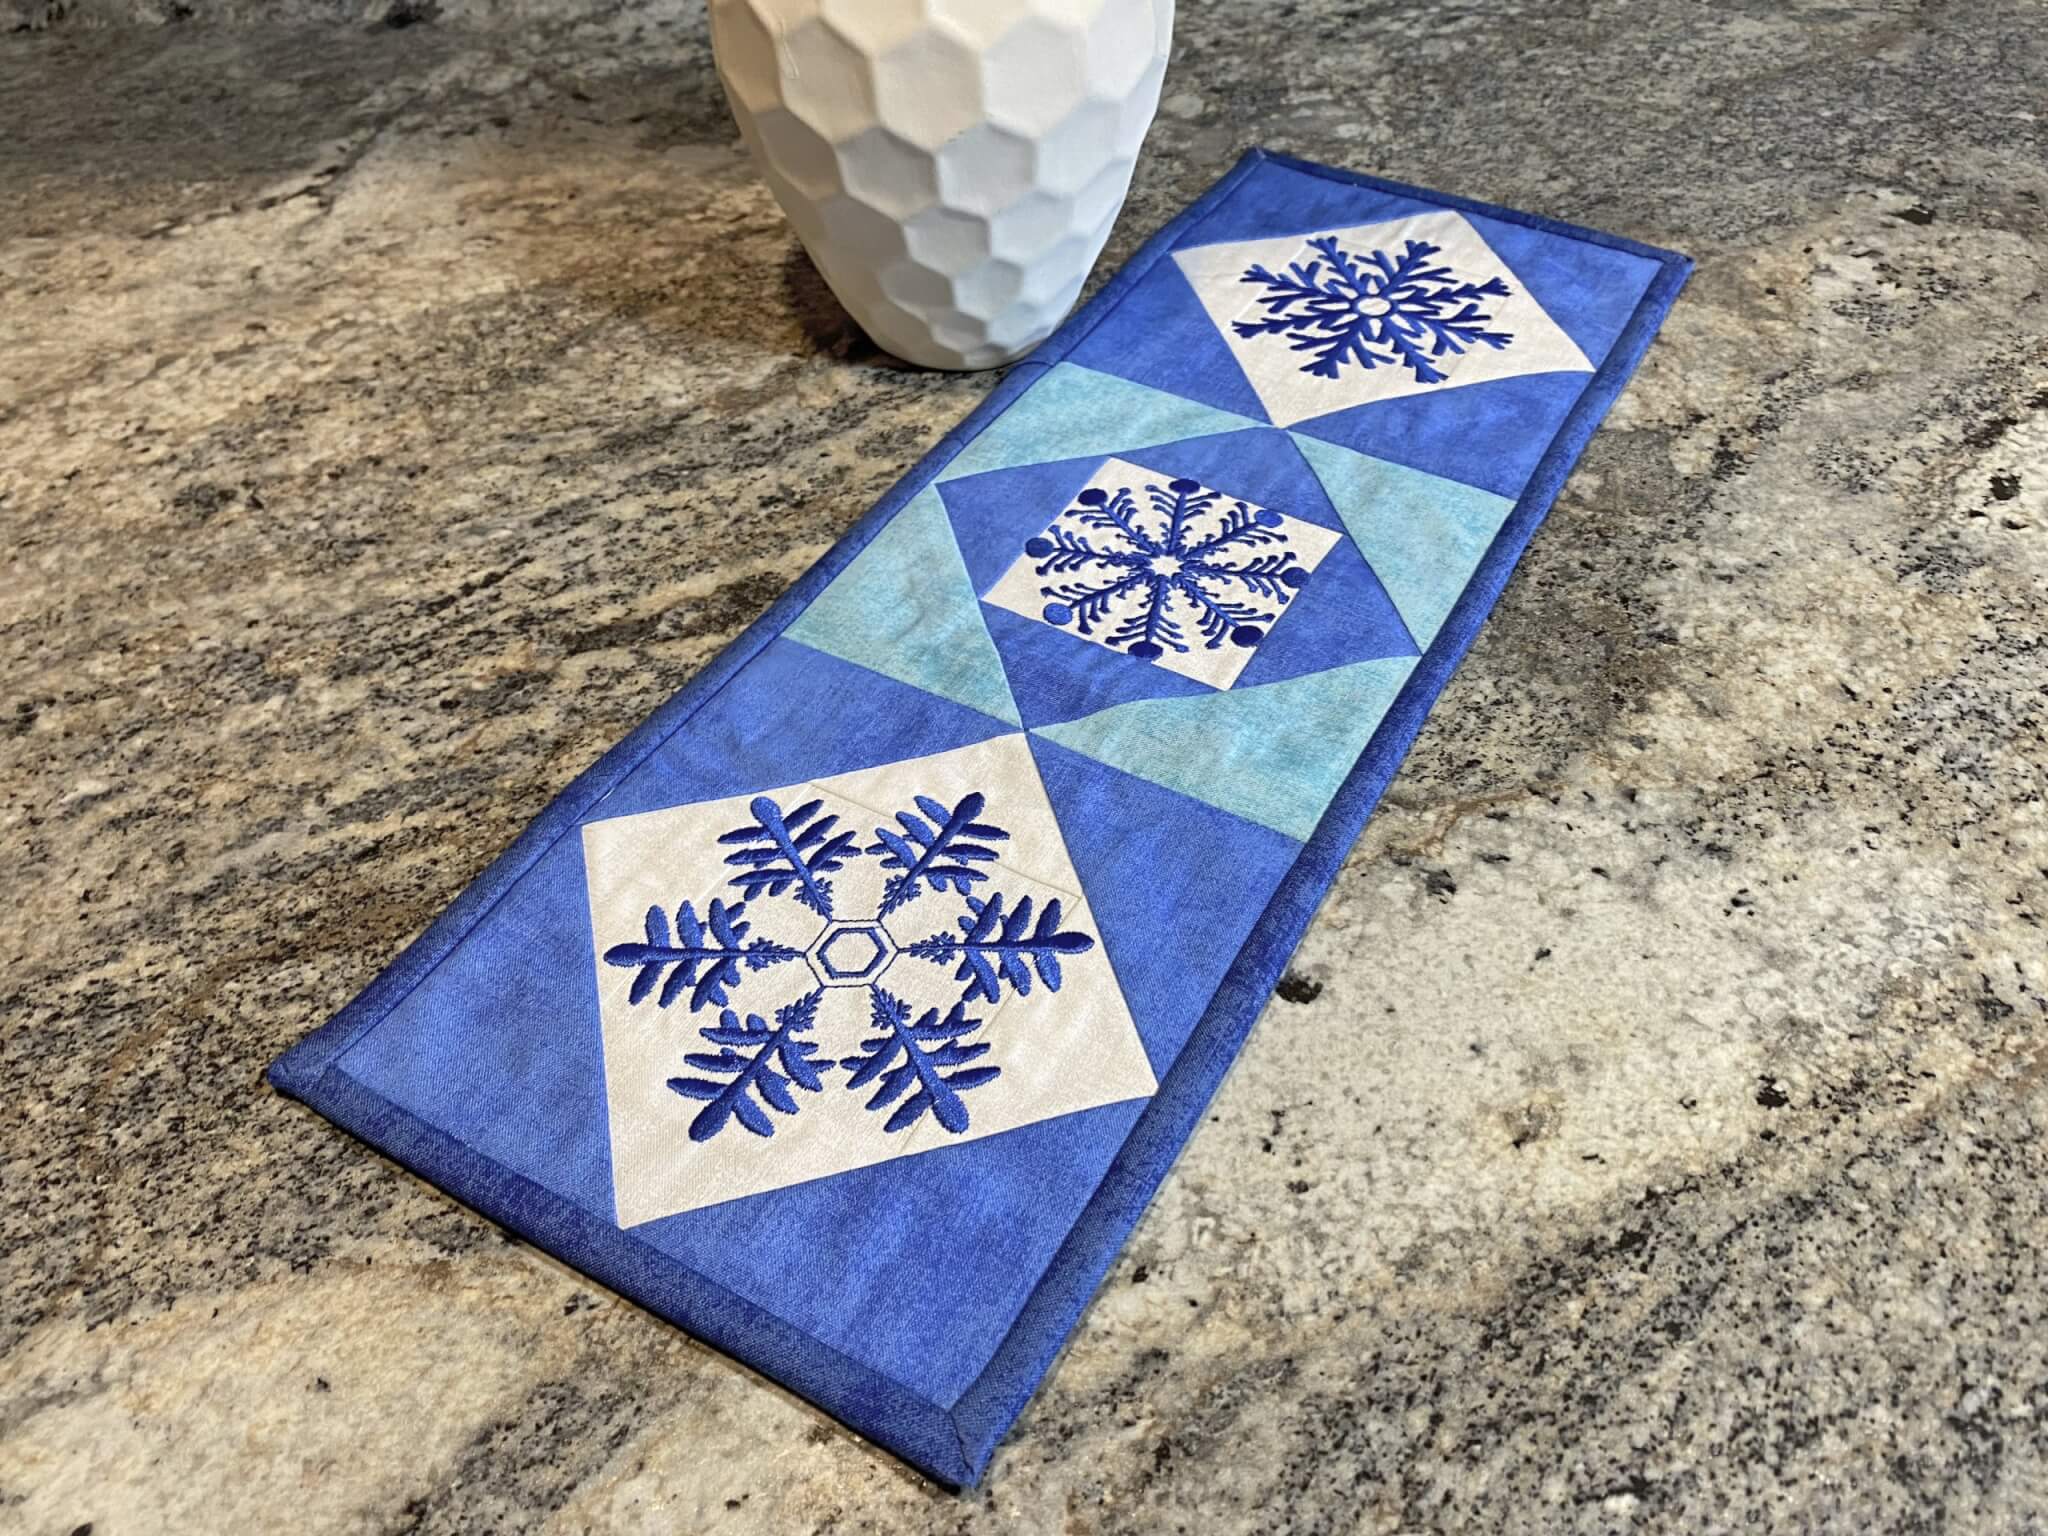
Piecing Techniques
The next step is to join the quilted blocks. Eileen walks us through this process with ease! Here’s a sneak preview. See the complete piecing demonstration on Sewing With Nancy.

Give it a try and join us next week for part two of Quilt with an Embroidery Machine in 8 Easy Lessons!
Watch Quilt with an Embroidery Machine in 8 Easy Lessons (Part One and Part Two) on Sewing With Nancy online.
![]()


Tell us which size design (6″, 7″, or 8″ quilt blocks) would best suit your project dimensions, for a chance to win the Quilt with an Embroidery Machine in 8 Easy Lessons book.


The randomly selected winner of the Fashion Sewing: Plain to Fabulous DVD and Two Patterns from Nancy’s Notions, is Mary Ann Stauffacher.

Her comment is: I love the longer jacket with the angled front panels. I just might use some orphan quilt blocks in the panels! Love it!

Happy Quilting!
Team Nancy Zieman
Nancy Zieman Productions. LLC.
![]()


L H
8 inch
diane c
depending on who I am making it for 6 or 8 inch
Nancy Lewis
My embroidery machine only has a 5 x 7 space, so I am limited.
Mary
The 8′ block will work great for me. This would be great to try on my embroidery machine.
Thank you for sharing.
Julie Kill
I have been researching embroidery machines for about a year. I would like to branch out into embroidered quilts, and other items. It’s my next purchase!
Therefore, I’m going to say 8 “. Because of the variability in what I create, I want to be able to do the maximum size for my quilting.
My logic- If I get the book and materials to try it, I HAVE to get the machine! It’s very motivational!
Cynthia C Edwards
This would be perfect for me to use on a vest, or a purse or tote bag. I’m 76 and am having trouble cutting some shapes but this would solve my problem. I like to make things for my grand daughters, and my self that no one else has. Its makes the gift special.
Thank you Cynthia Edwards
DIANA
This looks like so much fun! Everyone needs some fun in their life….I love to quilt and this looks like a technique I would like to try. 8″ size.
Teri
I think I use 6 inch blocks most.
Susan Spiers
So pretty – 6″ blocks! My largest frame is a 5×7 on my embroidery machine! Thank you, Susan
Gail K
Ooh, I would love to try a project with 8 inch blocks as I have a jumbo hoop. Currently I need a bit of a jump-start to get my quilting game back in gear. Thank you for the opportunity to win this lovely bundle!
Laura M
I like the bigger blocks for quilts, so 8″ would be wonderful.
Chris
I would love to make heirloom quilts for each of our 3 adult children but don’t have the time to do this by hand. Since they all have king size beds, the 8 inch size would probably be best so I can complete the projects before running out of time or interest in them!
beth d.
I could du all sizes. I have an 8″ by 8″ hoop. I would love to embroider all designs and make a quilt.
Dixie
The 8 inch would be the perfect size.
Bev
I’d need 6″ blocks since my bos are small.
Sharon
I would use 8 inch. It is my favorite size quilt block.
Marie
Thanks for the opportunity to win this book. I have other books by Eileen and love her inspiration. I think the 7 inch block would work nicely for this project.
MoeWest
6 inches
Tammie Kielpinski
I would use all 3 sizes . As I would be using different color threads and different colored fabric for each section sewn . All the sizes used in one piece to make a beautiful wall hanging . My second would be for an extra special quilt . I would want the pieces to pop . Make it more noticeable .
Carolyn
The 6″ one
DeAnns S
I seem to use 8 inch the most. The technique looks awesome and I would love to incorporate my embroidery machine more often than I do.
JANET OAKS
8 inch block
Ann West
I love all 3 sizes – so many blocks to choose from!
Marty Askins
I love all 3 sizes, but I love the 8″ the best.
Lillian K
The 8″ size works best for me. Wish there was a larger size also.
Julie
I usually prefer larger, even sizes for blocks. Sashings and borders can have the odd 1″, 3″, and 5″ sizes.
Peggy V
Just purchased and 8″ hoop for my machine so that would be my first project!!! Thank you for the opportunity to win this book!!!
Rosie
I think I would use all three, but I’d definitely start with the 8 in size. I have an 8 inch hoop but haven’t used it yet. That’s why I would use it first.
Bonnye
I would like 6″. I would le to make some table runners.
Barbara Gearin
I like the look of 8 in blocks. This would be the greatest way to get a quilt done. I have had my embroidery machine since 2001 and have never done this all in one before. It would be great to actually get a quilt done in a not so long time span.
Clovis
The 6 inch would be perfect.
Joyce West
I would only be able to do the 6″ one with my machine.
Claudia DiNardo
I can make any of those sizes, but I prefer the 8-inch blocks. The applique, embroidery and stipple design are very nice in the table runner.
Marie
Learning new things to create with my machine seems to be an ongoing thing…..I love it! Learning to appliqué with embroidery is a challenge I am looking forward to. Thanks for the lessons!
Joyce
I think the 6 would work best for me. Thank you.
Bonnie
What lovely designs! I would really like to learn how to use my embroidery machine for quilting. Since I usually make smaller quilts, the 6″ block would be perfect for my projects. Thanks for the great giveaway.
Susan
Would select 8 inch blocks because the bigger blocks could make an outstanding visual impact. Would love to master using the embroidery feature of the sewing maching with quilting.
Cynthia d.
It seems like the 8 inch would be great to begin with for a table runner.
Michelle Hall
I think the 8 inch block would make a great impact on most projects
Jenn
8 inch blocks would be great for a nice, easy and stunning quilt, but I am sure other sizes would be just as great. Maybe even things other than blocks? I imagine the process would be helpful for even those “non-block” quilts we all enjoy seeing.
Caroline s
I’m new to embroidery and my machine would only let me do a 6” block, but it’s a start !