

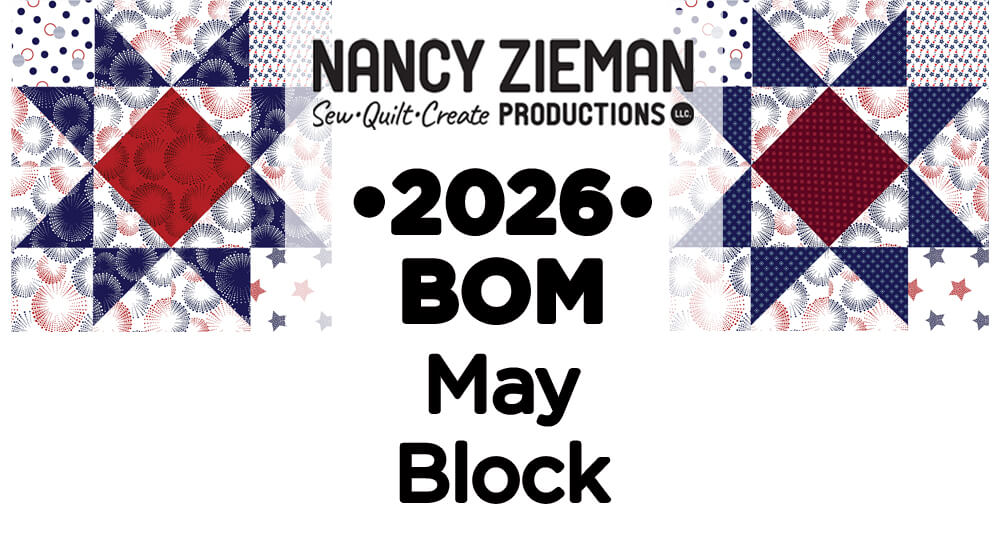
Fat Quarter Mystery Quilt: March Block of the Month
Introducing the March Block of the Month: Duck & Duckling*
The Duck & Duckling quilt block is the March Fat Quarter Mystery Quilt Block. Like all blocks in this year’s block of the month challenge, this block is 15″—finished size—and is based on a combo of half-square triangles and squares. Simple!
During this 12-month block of the month challenge, all blocks will be made from one 24-piece fat quarter bundle and 2-1/4 yards of cream background fabric, not including backing or binding. We’re using the fat quarter bundle, Garnet, it’s my most recent fabric line from Penny Rose, a division of Riley Blake Designs. You’re definitely welcome to use another collection of fabric or fabrics from your stash!

Choose the Fabrics
For the March block, select the following fabrics from your Garnet fat-quarter bundle. If you’ve chosen another fabric collection, select one darker tone, two medium tones, and the background fabric, for a total of four fabrics

Half-Square Triangles (HSTs)
Cut the following to create four HSTs:
- Six squares measuring 3-7/8″ x 3-7/8″ from cream background fabric
- Two squares measuring 3-7/8″ x 3-7/8″ from medium fabric (pink fabric shown)
- Four squares measuring 3-7/8″ x 3-7/8″ from dark fabric (garnet flowers on garnet background)

Make HSTs:
- Option one: Mark each block set diagonally from one corner to the other, using a fabric marking pen and ruler.
- Option two: Use a No-Hassle Triangle Gauge. The left side of the gauge is designed to create HST blocks.
 Depress the button on the sliding portion of the gauge and move to the 3-1/2″ HST icon on the left side of the gauge.
- Place gauge on the block set, corner to corner. Match corner marks of gauge with corner of block sets. Mark fabric through center of gauge with a fine-point, fabric-marking pen.

 Note from Nancy: The advantage of using the No-Hassle Triangle Gauge is accuracy. It’s easy to double-check that the block set fits within the confines of the gauge. If the block set extends beyond or is shorter, trim or cut another block.
Stitch Half-Square Triangle Block Sets
- Attach a 1/4″ patchwork/quilting foot.
- Set machine for a straight stitch, 2.0–2.5 mm in length.
- Align foot along one side of the center marked line; stitch a scant 1/4″ from center marked line. Do not cut the threads.
- Kiss the next block set to the stitched block and chain stitch from one block to the other.

- Clip threads between chain stitched blocks. Rotate blocks 180-degrees. Align foot along second side of center marked line; stitch. Clip threads between chain stitched blocks.

- With a rotary cutter, mat, and ruler, cut the blocks apart along centerline markings.

- Press seam allowances toward the darker fabric.

- Set four light + medium and eight light + dark half-square triangles aside.


Watch the No-Hassle Half-Square Triangles episode of Sewing With Nancy for a complete demonstration of the gauge and technique.
Solid Units
- Cut four squares 3-1/2″ x 3-1/2″ from dark fabric.
- Cut one square 3-1/2″ x 3-1/2″ from medium fabric.

- Cut four rectangles 3-1/2″ x 6-1/2″ from medium fabric.

Create Block
- Arrange the large block as shown:
 Assemble Quadrants:

- Working on one quadrant at a time, arrange the pieces as shown below:

- Join pairs.

- Press seam allowances in one direction. Press the top row to the right and the bottom row to the left.
- Flip the lower pair up onto the top pair, matching right sides.
- Lock the opposing seam allowances and stitch.

- Open. Press seam allowances in one direction.

- Repeat steps to create four quadrants.
Create Horizontal Bar Unit
- Arrange two medium rectangles and one medium square as shown:

- Matching right sides, sew the square to the left rectangle.

- Open. Press seam allowances towards the rectangle.

- Matching right sides, add the remaining right-hand rectangle to the center square.

- Open. Press seam allowances towards the rectangle.
 Build the Block

- Each block will have two rows assembled as shown below.
- Arrange the top and bottom rows Quadrant + Rectangle + Quadrant; as shown:

- Matching right sides, sew the rectangle to the left quadrant.

- Open. Press seam allowances towards the rectangle.

- Lay the remaining quadrant on the rectangle, matching right sides. Sew.

- Open. Press seam allowances towards the rectangle.

- Repeat these steps to create the remaining bottom row.

- Join top row to the horizontal bar unit. Lock the seam allowances.

- Open. Press.

- Join the bottom row to the horizontal bar unit. Lock the seam allowances

- Press.
The third block in the 2017 Fat Quarter Mystery Quilt is solved!Share Your Success!
If you are on social sites, let all your friends know you are working on Nancy Zieman’s 2017 Fat Quarter Mystery Quilt by tagging your post with the hashtag: #NZBoM. Share you finished blocks with Nancy and her team by emailing them to [email protected].
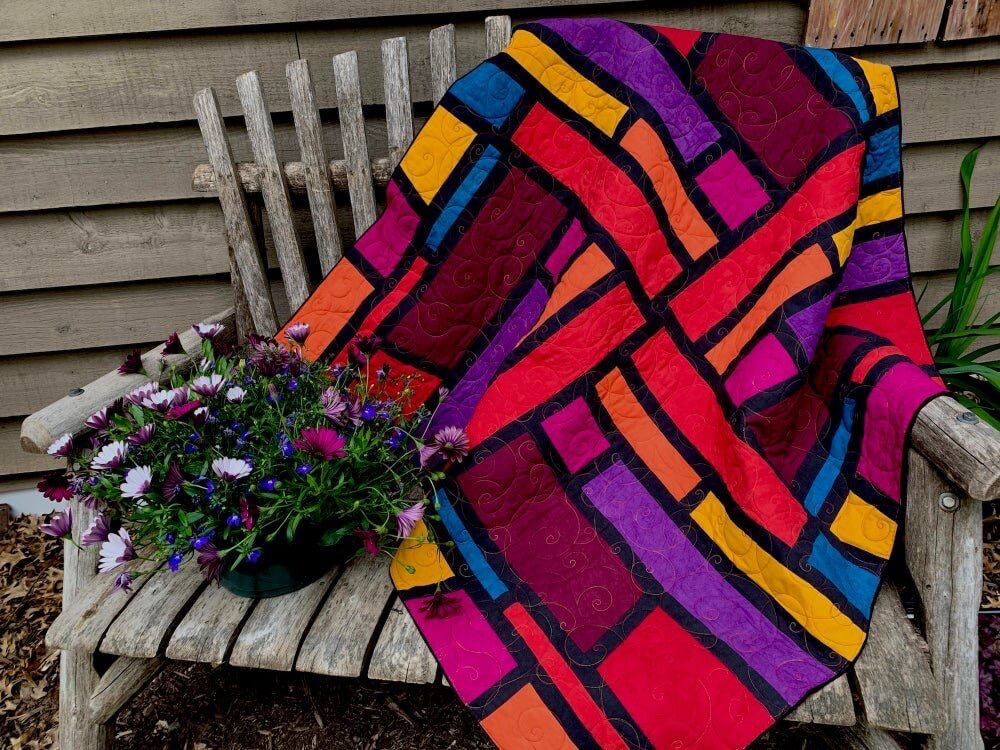
During the 2015 Quilt Adventure and the 2016 Quilt Extravaganza, I shared three virtual quilt designs made with the month’s single block. This year, I’m changing it up and sharing block color variations of one block. Please note that the fabrics required for color-varied blocks will be slightly different than the original block of the month directions presented.
Take your Block to the Next Level
- Visualize an entire quilt made from this block. Each block will measure 15″ square when sewn into a quilt. No sashings were used to create this quilt top! The block creates a secondary design when sewn together. Read more on finishing the quilt in my book Fearless Quilting Finishes. This quilt as shown measures 90″ x 105″.

- Notice the subtle differences in these four color variations of the Duck & Duckling block.


Watch No-Hassle Triangles Quilt Blocks on Sewing With Nancy online.

If you missed any of the complete block tutorials, find the 2017 Fat Quarter Mystery Block of the Month on my blog.
Watch for the April Block of the Month on Saturday, April 15th.
Bye for now,
![]()
Content in this feed is © copyright 2017 by Nancy Zieman and may not be republished without written permission. You’re welcome to forward the email to a friend or colleague but it’s not okay to add the RSS feed automatically as content on a blog or other website.
The FTC requires us to tell you that Nancy Zieman has provided products by other companies in the course of her business. The FTC requires us to advise you to take this information into consideration when reading this posting.
Make sure you are subscribed to my enews mailing list so you won’t miss a thing. Sign up here. Join us on Facebook, plus a host of other social media channels. Connect With Nancy today!
Save


Linda Harvill
Nancy just want to let you know how much I enjoy being able to get my pattern every 3rd Saturday like you promise. Actually my main computer is down right now but I’m able to get you thru my Verizon Ellipsis with no problem. Your website makes it easy! This is a first for me! Thank you! Thank you!!
Linda Harvill
Clovis
Thanks for the March block.
Sandy N.
Will the blocks be available as .pdf files?
Thanks
Nancy Zieman
Sandy,
Scroll to the bottom of blog. There you will see a PDF file logo. Clink and print!
DebbieW
Love the same block, different fabric looks.
Starla
Really like this block!
Rebecca Christie
thank you for the lovely blocks- I am using some of my “stash.” While I do want to continue to support my local quilt shop, I have so much stash it will take my entire life time to use it up. So hey, I figure “What am I saving it for?” I better start using it up.
S Carter
Nancy, I really enjoyed your instructions along with the photos which help me to create the blocks. Thanks!
Sunni
Thanks! I very much enjoy seeing the quilt block with different fabrics. It is a lovely block.
Annegp
I’m really interested in doing this BOM. I understand it is angled towards a specific fabric line (appears to be 24 different fabrics). Would you be able to tell us how many different low, medium and high contrast fabrics there are in the line, so we could translate them to what we have in our stashes. We could always look on line, but if you could advise that would be good, It would be a real help in planning. Many thanks
Nancy Zieman
There are about six of each light—medium—dark fabrics. This is a great scrap buster quilt!
Kathe Schofield
Been waiting for my garnet fat quarters for about a month. Hope they come in soon so I can start on my blocks. It was supposed to be in last week and when I called, I was told it would be sent out soon. Looking forward to it!
Kathe
susan
Love the blocks for the mystery quilt using granet fabric. |How many blocks do we make a month with the same fabric?
Nancy Zieman
Susan there will be a block a month during 2017. In December, we’ll also show you how to finish the lap-sized quilt. Thanks for following along.
"Willie" Loyall
Fell in love with the Garnet collection in Jan., and with the help of a friend, was finally able to get the PDF instructions to print!! I ordered the fat quarter bundle, background and binding fabrics yesterday! Yeaa!!!!! Can’t wait to get started and catch up! Willie
Kathe Schofield
Willie,
Yes, I love the fabric too, I hope it comes in soon. I have been waiting since Feb 21st. Would love to start on the blocks!
Kathe
Sherry Moran
Ready to cut out block 3, but, I’ve noticed that the beige fabric looks different in different pictures. I first thought I was missing a fat quarter, but in later pictures, it looks as dark as my piece of fabric.
I’m making mine just like yours and I love it! Red is my favorite color and Garnet is a gorgeous fabric line – thank you for it! How much will we need for the backing? I want to get it ASAP. Thanks again!
Nancy Zieman
Sherry, we used the same cream/beige fabric in all the blocks. Our photography, perhaps, isn’t the best! We quickly take photos during the process and the lighting may vary.
The finished quilt measures 57″ x 75″, which will require two lengths of fabric, about 6-1/2 yds. Often I make a scrappy backing in order to save on fabric. My suggestion is to purchase 3-1/4 yards of fabric for one length (81″ in length). To achieve the 57″ for the width, consider using leftover fabric to piece a 17″ wide x 81″ section.
Nancy Zieman
Sherry,
The finished quilt is 57″ x 75″. For backing fabric, you’ll need two lengths which is 6-1/4 yards. Often, I only purchased one length of fabric, in this case 3-1/4 yards and then I make a scrappy section from leftover or compatible fabric. In this case the scrappy section should measure approximately 18″ x 75″. Of course that’s a personal choice, but I find it more economical and interesting as well! We have a blog post on piecing quilt backs with the scrappy concept. http://www.nancyzieman.com/blog/quilting-2/sew-creative-and-economical-quilt-backs/
Thanks for following along! Nancy
genucel200.com
Back in 1982 when the first Sewing With Nancy show aired, never did I dream; #1, that I’d still be recording shows and #2 that the show would be ava.