
2016 Quilt Extravaganza—November Block of the Month
Eeek! After this block, there’s only one lonely block left in this year’s 2016 Quilt Extravaganza—Block of the Month! November’s block is named Meet in the Middle. Unlike the other months, November’s directions will provide enough cut pieces to create two blocks—if you like.
- Use the Carefree Curves Template to easily create the shapes without setting in curved seams.

- Check out the details in the January 9 blog on how to select fabrics from your stash. Use as many scraps from your stash as possible. I’ve selected bright and neutral fabrics for this quilt.

- All blocks for 2016 will be created from pieced fabric strata. Read more on this blog post.


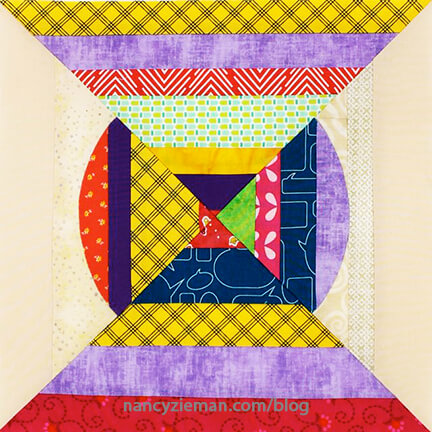
Block #11: Meet in the Middle
Supplies:
- Neutral fabric strata
- Bright strata
- Lightweight fusible interfacing
- Point 2 Point Turner
- Trace ‘n Create Carefree Curves Template Set Hearts & Gizzards Template
- Monofilament thread
- Fine tip non-permanent marking pen
Mark and Cut Fabrics
Mark and cut the following fabric and interfacing pieces:
- Cut 13-1/4″ x 13-1/4″ squares from both neutral and bright strip sets or strata.

- Subcut blocks on the diagonal to yield four quarter-square triangles.
 .
.
- Cut an 9-1/2″ x 9-1/2″ square from the bright strata and interfacing. Pin the smooth, non-fusible side of interfacingto right side of fabric square to create a patchwork sandwich.

- Center the Carefree Curves Circle Template on the interfacing side of the patchwork sandwich.
- Use a fine tip marking pen to trace the 8-1/2″ circle onto the interfacing.
 .
.
- Straight stitch, using a short stitch length, 2.0–2.5, directly on the marked circle.
Note from Nancy
Use a short stitch length to ensure a smooth stitching line when sewing a curve. I often compare using a short stitch length when sewing curves to driving in the mountains. To maneuver the curvy road, a slower speed safeguards that you’ll stay on course.

- Use a rotary pinking blade to remove excess fabric from the circles. Trim 1/4″ from the stitching line.

- Trim away the excess interfacing within the circle, leaving approximately 1″ of interfacing.


The circle shape is divided into fourths and, thanks to the strata, appears to spin on top of the background. Here’s a trick to create a perfect 45 degree angle:
- Position the template on the finished circle aligning the horizontal line parallel with strata seams.
- Mark the 12 o’clock and three o’clock positions.
Note from Nancy: You may opt to add pins at the marked location, if the marks are hard to see on colorful fabrics.

- Fold circle in half matching 12 o’clock and three o’clock marks and wrong sides.
- Press.

- Fold in half again.
- Press.

- Open circle.
- Use rotary cutting tools to cut straight lines along pressed folds.

Build the Quilt Block
- Arrange the quarter-square triangle pieces to match opposing triangle strata. Remember, you will have enough background pieces to create a second block.
- Set quarter circles on neutral strata, matching the cut corners.

- Pin quarter circles to neutral backgrounds.

- Edgestitch, using monofilament thread in the needle and thread that matches the background fabric in the bobbin.
Note from Nancy
I used an Open Toe Foot when stitching the semicircle to the background. The extra open space in the foot makes it easier to see the curve of the appliqué.

- Pin adjoining quarter-square triangles, right sides together; stitch with a 1/4″ seam allowance and all-purpose thread.

Note from Nancy
Notice that the fabric edges in these seams are bias. Be mindful not to stretch the stitching line as you sew. Consider using a Walking Foot to evenly feed the quarter pieces under your presser foot.

- Press seam allowances open.

- Align the two block halves; stitch.


- Press seam allowances open.

- Ta-dah! Another block is complete.
What would a Quilt Look Like?
Suppose we were to make a quilt using only this one block style, what would it look like?
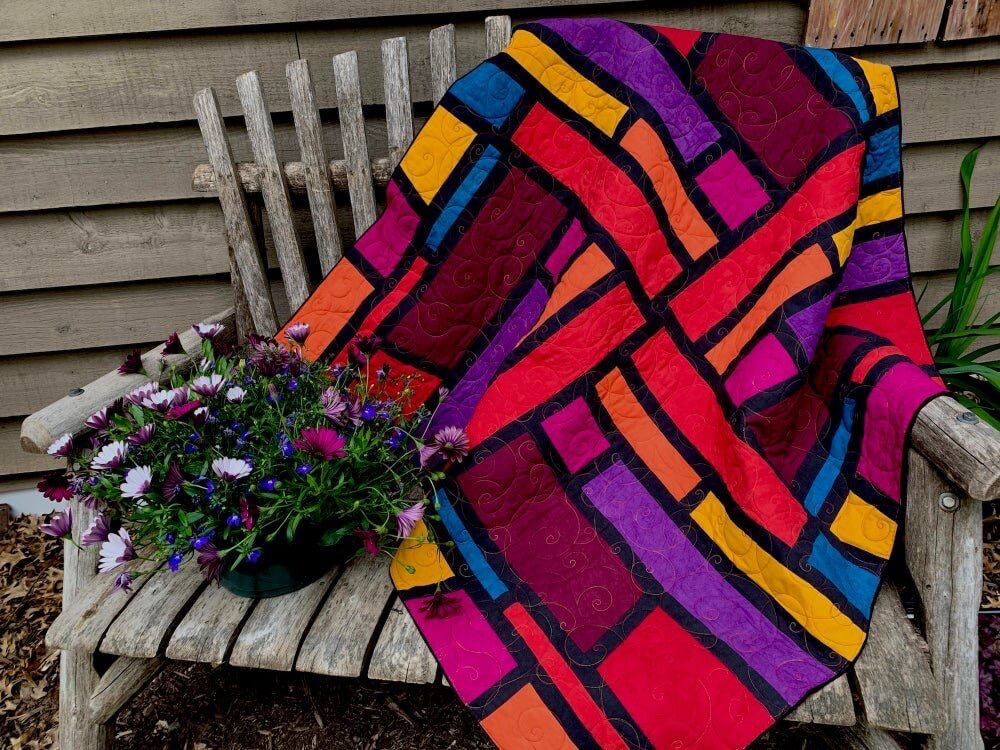
- This first digital concept features a four by six block grid, which rotates alternating blocks. The blocks are framed with borders cut from extra strata pieces. Notice the borders are mitered; meeting at a 45 degree angle in the corners. See how to create the look in my book, Fearless Quilting Finishes.

- The second digital quilt concept builds on the alternating blocks. By matching bright and neutral strata sides a secondary “on-point” square design is created.

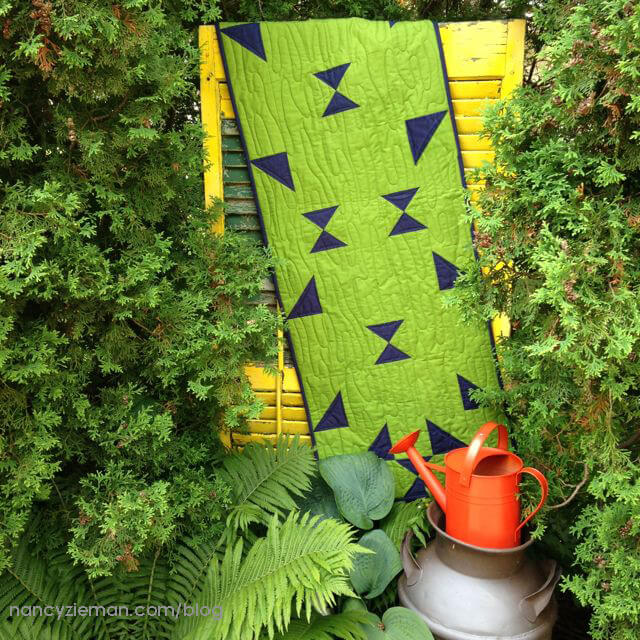
- The last digital design is a scrappy bed runner. This project is two blocks by seven blocks and is designed to dress up the foot of your bed. By using leftover strata pieces, this runner will look extra scrappy.

We’ll be using the Carefree Curves Template throughout the entire 2016 Quilt Extravaganza. Watch episodes online for more tips on using the templates in my two-part series featuring the Trace ‘n Create Carefree Curves tools on Sewing With Nancy.
Watch Quilt with Carefree Curves (Part One and Part Two) on Sewing With Nancy online.
Sew and Share
Send in a photo of your blocks and quilts, and we’ll share them with others in upcoming blogs and on Facebook. I’d really like to see what fabrics you’re using! Send the images to [email protected]
Bye for now,
![]()


DebbieW
Looks fun!
Linnie
Somehow I have missed out on October’s BOM of month. Is there any way I can get it.
Nancy Zieman
All the 2016 block of the month blog posts/patterns can be found here: http://www.nancyzieman.com/blog/category/2016-block-of-the-month/
Nancy Zieman
Linnie, along the right side of the blog is a link to 2016 Block of the Month. You’ll find all the links at that area. Or, just enter 21016 Block of the Month in the search bar and you’ll find the right instructions. Regardless, here is the link! http://www.nancyzieman.com/blog/quilting-2/2016-quilt-extravaganza—october-block-of-the-month/
Margaret Shaw
I have always made quilts for the bed sizes I currently had, now a king. I don’t get very many finished in a year because of this. I love to make table runners. I have been thinking of starting to do miniatures so that I can try more patterns as I will never have enough time in my life to attempt all the things I see.