

2015 Adventure Quilt: Block of the Month #9
During this Block of the Month lesson, learn the secret to stitching perfect circle shapes. Not to worry, you will not be cutting curved shapes; the magic happens with rectangles, fusible interfacing, and a short stitch length. My quilting tip of using fusible interfacing is the key, which practically guarantees a smooth, gradual curve. September’s Block of the Month in The 2015 Adventure Quilt is the Celestial Circle. To create the Celestial Circle, use the Trace ‘n Create Carefree Curves Template Set. Here’s how:
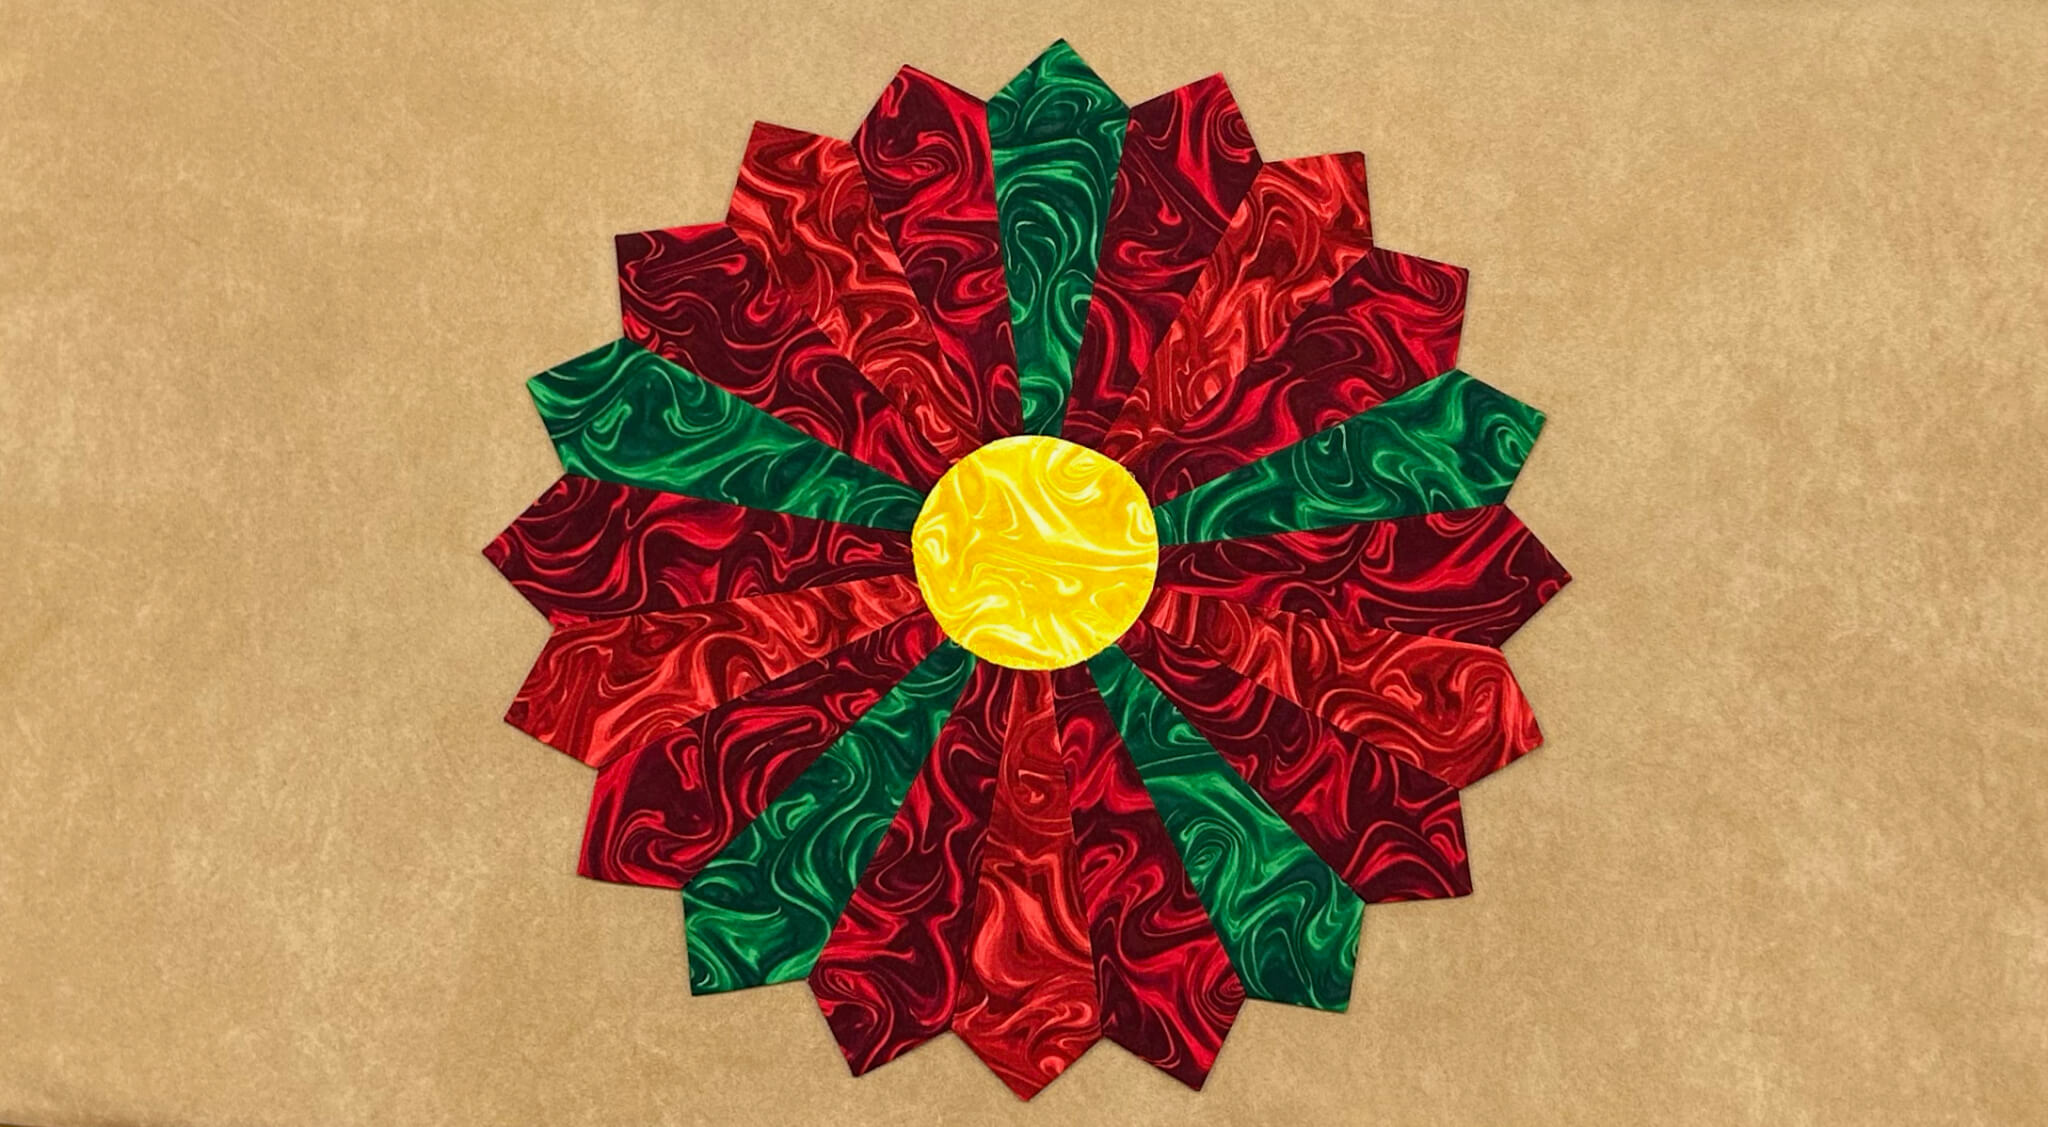
Block #9: Celestial Circle Quilt Block
All blocks in The 2015 Adventure Quilt measure 12-1/2″ x 12-1/2″, creating a 12″x 12″ finished block. 1/4″ seam allowances are included.
Notions, Fabrics, and Supplies:
Get started by choosing fabrics. Any three color combinations will work. I had a surplus of black, white, and chartreuse green in my quilting fabric scraps. If you’ve been following along, you know that this Block of the Month series is a scrap fabric adventure.

- Assorted Fabric Scraps
- Lightweight fusible interfacing
- Point 2 Point Turner
- Trace ‘n Create Carefree Curves Template Set
- Monofilament thread
- Fine Tip Non-Permanent Marking Pen
Cut Fabrics
Cut the following fabric and interfacing pieces:
- Cut two 6-1/14″ x 12-1/2″ fabric rectangles (background).
- Cut two 5″ x 9″ fabric rectangles (for circles).
- Cut one 1″ x 12-1/2″ fabric rectangle (dividing strip).
- Cut two 5″ x 9″ interfacing rectangles (for circles).
 Create the Semi-Circles

- Using the 5″ x 9″ fabric and interfacing rectangles, pin the smooth side of the interfacing on the right side of the fabric. Make two pair.
- Align the Carefree Curves circle template centerline with the cut edge of the fabric/interfacing pair.
- Using a fine tip marking pen to trace the 8-1/2″ semi-circle onto the interfacing. (This is the pink ring on the template.)

- Straight stitch, using a short stitch length, 2.0—2.5, directly on the marked curve.

- Use a rotary pinking blade to remove excess fabric.

- Remove the excess interfacing from within the circle, leaving approximately 1″ of interfacing.

- Turn the interfacing to the wrong side with a turning tool.

- Press.
Build the Block

- Fold the background fabric in half to find the center. Lightly finger press.
- Fold the semi-circles in half to find the center. Lightly finger press.
- Align the centers and cut edges of each semi-circle and background fabric.
- Pin semi-circles to the backgrounds.

- Edgestitch with monofilament thread.

- Lay out the block with the center dividing strip.

- Use a 1/4″ seam allowance to join the center dividing strip to the left side of the block.
- Press seam allowances towards the center dividing strip.

- Use a 1/4″ seam allowance to add the right side.

- Ta-dah! Another block is complete.

Share your 2015 Adventure Quilt Blocks Socially
If you have a blog site, website, or online social sewing group, feel free to grab the code and share this button.

————–
If you are on social sites, let all your friends know you are working on The 2015 Adventure Quilt Blocks by tagging your post with the hashtag: #NZBoM.
The hashtag is a searchable “word” associated with an event or activity, which when searched on popular social websites, like Instagram, Twitter, Flickr, and Facebook, will show every single post using that hashtag. Hashtags are a fun way to network and connect with people who share similar interests.
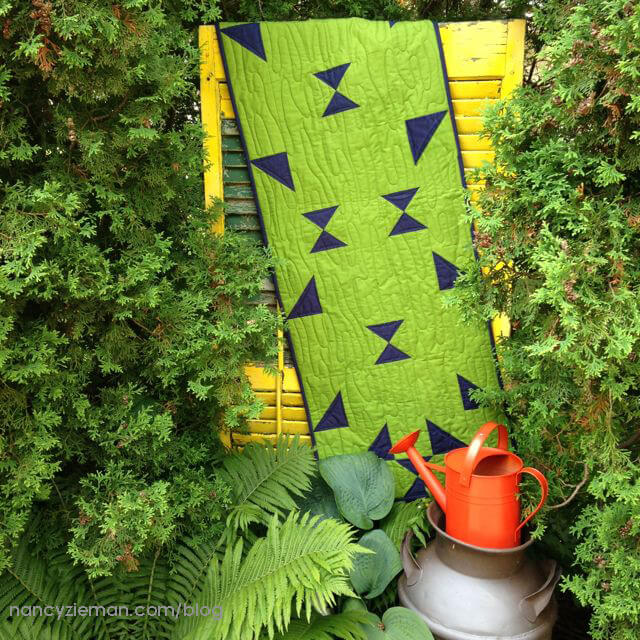
What would a Quilt Look Like?
As part of this Block of the Month series, included are ideas of what a quilt might look like if you made it with only this month’s block. This block inspired me; I have four digital concepts rather than three. To my surprise, I did not use sashing in any of these designs.
- This Celestial Circle is arranged in an alternating traditional grid pattern. The result is anything but traditional.

- I wanted to include a small design of only nine blocks. This concept lends itself to featuring the small, but bold, center dividing strip. Notice that the center block is a square without patchwork.

- Sometimes quilts can be completely organized, symmetrical, and create great rhythm in repetition. The following quilt is one of those designs.

- I took a bit of liberty with the block when creating this last concept quilt. For the second row, I omitted the circle appliqué on four blocks and simply created a feature-bar element in the design.
 Watch Carefree Curves (Part One and Part Two) on Sewing With Nancy online.

To watch Sewing With Nancy on your iPad, iPod Touch, or iPhone, download the app.

Don’t Miss the Other 2015 Adventure Quilt Block of the Month Features
See all the 2015 Adventure Quilt Blocks HERE.
Bye for now, ![]()


Sally Fester
Did not know you were doing a block of the month.. Maybe I will start on one next year when you do a new one…. TY for sharing your time with us!
Elizabeth Rivera
I will start one next year also like Sally. I also thank you for all the great lessons you have given. I hope you are in good health.
Mary B
I’ve been following the block of month series but due to difficulties in printing have been unable to have copies of all the blocks. Will there ever be a print copy available??? Love the modern look but think it would work with any fabric design, I really like the ideas using each individual block. Thanks so much!!
peaceful
Anything that helps with curves & circles is a good tool. Very good instructions, as always.
Thanks for your sharing and caring.
Gail
Thanks for sharing another great tutorial!
Lucy
Would love to make this quilt but unfortunately not able to afford the rulers for this project. Great instructions, love the quilt blocks in this block of the month. Thanks.
Kate
I just love you to pieces Nancy ! I pray you’re having an easier time now. I do remember the “Home” Recordings!! A note to Lucy, if you just take paper, a ruler, and protractor there is no reason you can’t make the blocks. May be more time consuming, but definitely can be done. I also know if Nancy puts her name on something, you know it’s quality!
Lucy
Thanks Kate for the advise – will try it.