
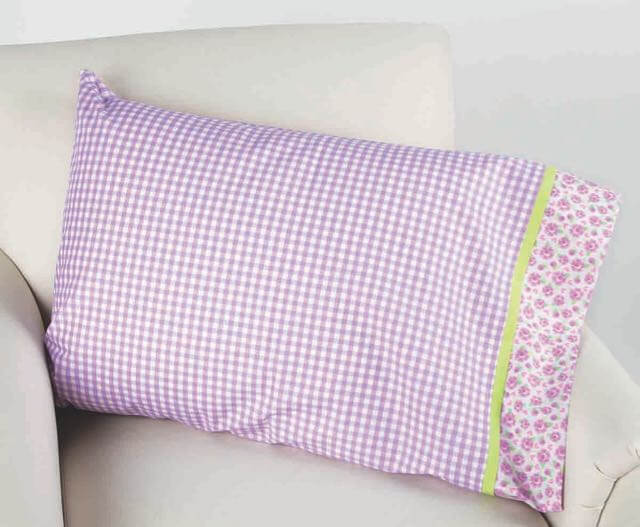
I Sew For Fun Project Tutorial: Pillowcase
Have a PJ party with your little partner as they make their very own pillowcase. Sweet dreams will definitely follow! This easy project is a favorite for gift giving too! Learn how to make an easy Pillowcase with this FREE! I Sew For Fun Pillowcase Tutorial by Nancy Zieman.


Tune in and watch Nancy and her granddaughters, along with friends, take a modern approach to sewing. Nancy shares her team sewing-for-fun experience along with many tips for a big partner, and numerous insights for involving a little sewing partner—all while making simple, easy to sew kid-friendly projects. Watch I Sew For Fun on Sewing With Nancy!
Pillowcase Sewing Tutorial
Approximate Finished Size: 20″ x 30″
Makes one standard size pillowcase.
 Let your little partner choose their favorite novelty fabric and two coordinates.
Supplies Needed
- 3/4 yd. non-directional print Fabric A–main pillowcase fabric
- 1/4 yd. Fabric B–border
- 1/8 yd. Fabric C–trim
- Coordinating all-purpose thread

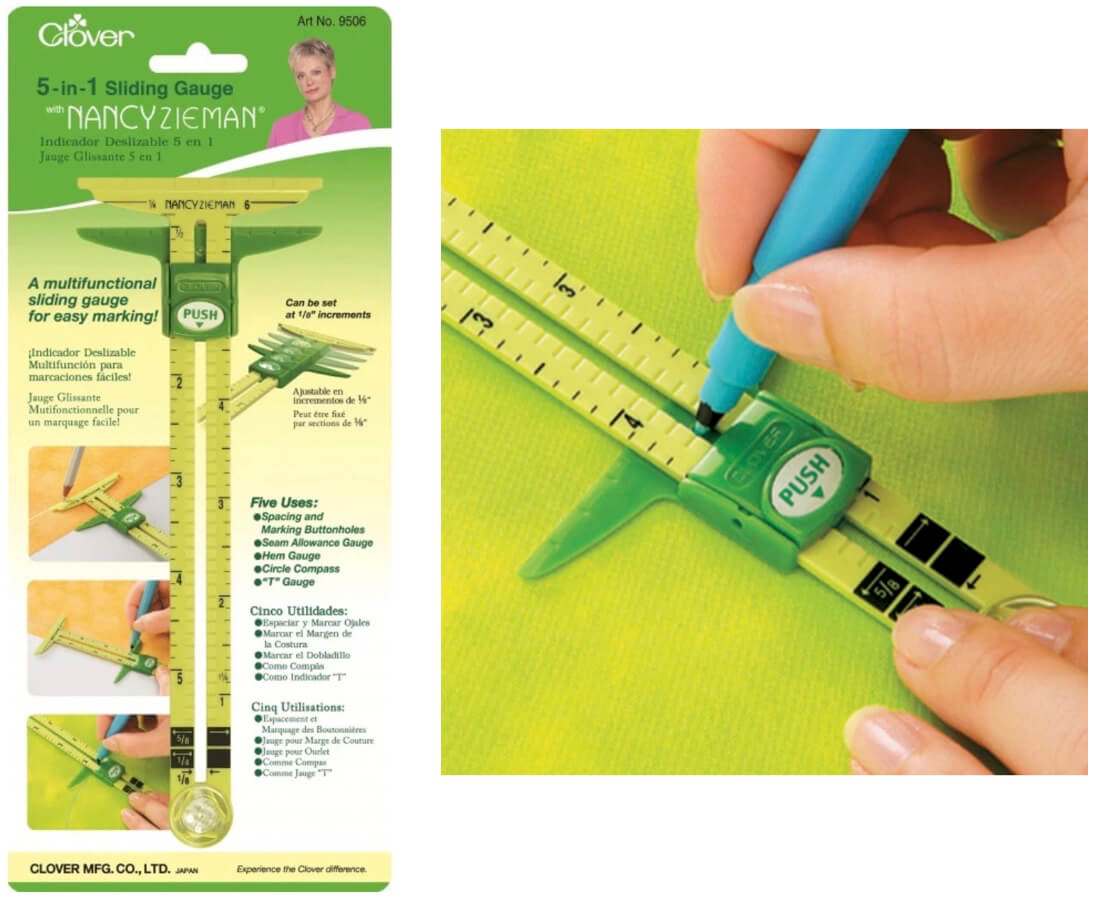
- Optional Notions: I Sew For Fun Heart Shaped Straight Pins, I Sew For Fun Magnetic Heart-Shaped Covered Pin Caddy and I Sew For Fun Sew Safe Presser Foot.

Instructions
Please read all instructions before beginning. Use the width of the presser foot as the depth of the seam allowance.
1. Press and cut the fabrics:
- Cut Fabric A for the main pillowcase using one of the following options:
–Cut the non-directional print Fabric A into a 27″ x 41″ rectangle.

- Cut a 9″ x 41″ rectangle from Fabric B for the border; set aside.

- Cut a 2″ x 41″ rectangle from Fabric C. Fold the 2″ strip of trim fabric in half, wrong sides together, aligning the lengthwise edges; press.

2. Assemble trim and border:
- Pin trim to the right side of the 9″ x 41″ border, aligning cut edges of trim with one lengthwise edge of the border. Machine baste.

- Fold border fabric in half, right sides together.
- Stitch the short ends of the border fabric.

- Press seam open.

- Fold wrong sides of border together, aligning the lengthwise edges. Press.

3. Stitch the pillowcase:
- Fold the Fabric A rectangle in half, right sides together, aligning the 27″ edges.
- Stitch the 20-1/2″ edge.

- Wrap the corner by folding the seam toward the pillowcase along the stitching line and stitch the side seam.

This is a great spot to teach your little partner one of Nancy Zieman’s favorite techniques—the wrapped corner!
- Turn pillowcase right side out.
- Pin border fabric over the main pillowcase fabric meeting cut edges, right sides together.
- Stitch the layers together. Clean finish cut edges using either a zigzag stitch or overlock serger. Press seam toward main body of pillowcase.

- Optional: Topstitch trim along the border fabric edge, catching the seam allowance.

Tune in and watch Nancy and her granddaughters, along with friends, take a modern approach to sewing. Nancy shares her team sewing-for-fun experience along with many tips for a big partner, and numerous insights for involving a little sewing partner—all while making simple, easy to sew kid-friendly projects. Watch I Sew For Fun on Sewing With Nancy!
![]()
Watch I Sew For Fun on Sewing With Nancy online at NancyZieman.com.

For a complete selection of I Sew For Fun companion sewing Tools by Nancy Zieman, visit ShopNZP.com

Happy Sewing!
Team Nancy Zieman
Nancy Zieman Productions. LLC.
![]()

DebbieW
A simple tank top using two rectangles of fabric.
Beverly Roget
I do a lot of sewing with 2 of my grandchildren. Ethan is 13 and is making his own computer bag with piping. And my granddaughter, Katelyn, is 9 and designing her own clothing. It’s a lot of work for me because I have to turn her design into a pattern with instructions! So My daughter and I are making a sewing box for them with neat sewing tools, like a heart shaped pin catcher. I’m also trying to find Klutz Gloves for both kids. I have a large for myself, which is too big for me, but need an extra small or small for her and a medium for Ethan. Do you carry them? Thank you for all your help over the years!
B RIEGSECKER
We are going to make a simple quilt placemat. Maybe try some free-motion quilting.
Barb K
My 10 year old Granddaughter has a small quilt of squares she has started.