

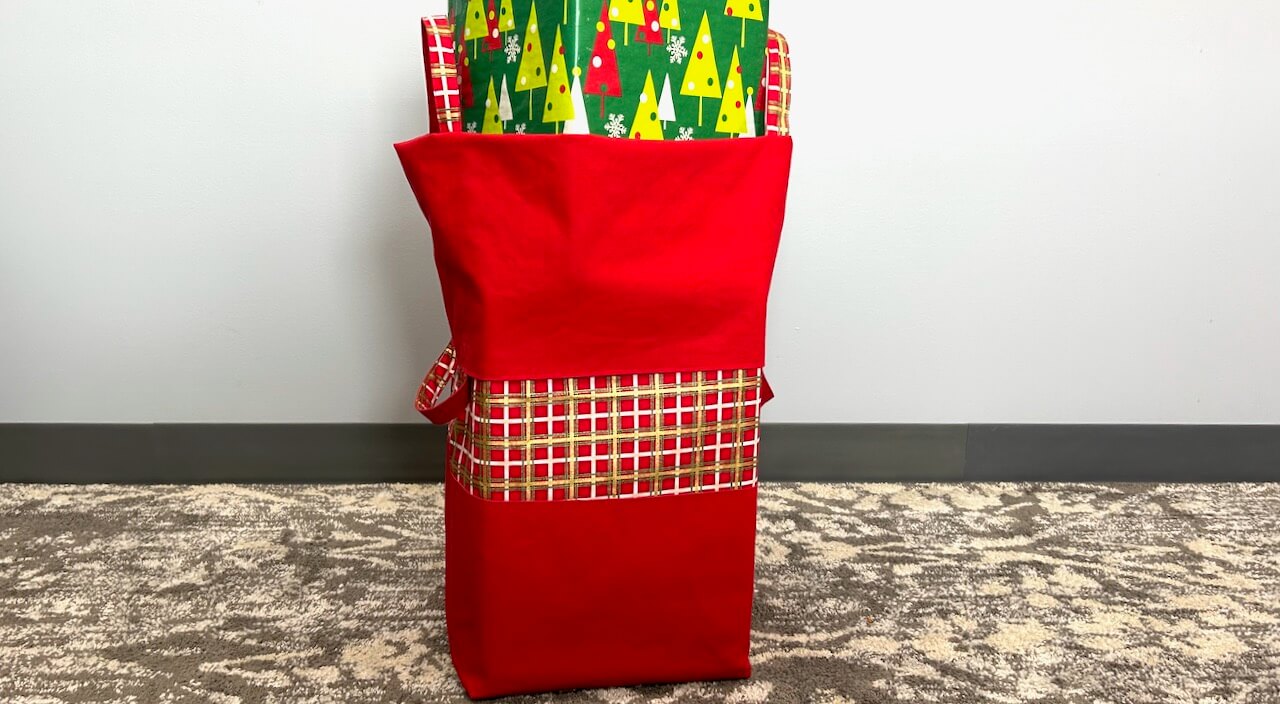
Sew a Tote and Display Your Collectible Pins
 Create this showcase tote using your embroidery machine or with your traditional sewing machine. That’s right, you can piece perfectly and quilt with your embroidery machine. This Stress-Free Quilting Showcase Tote bundle, from Amazing Designs, includes pieced blocks and a computer-guided embroidery machine quilted design. In addition to the fun bag pattern, bonus table topper pattern, and optional foundation paper-piecing templates are included. Talk about bang for your buck!

. The blocks, Snowball and Square-in-a-Square, are combined to show off your favorite collectible pins, buttons, photos printed on fabric, embroideries, appliqués, fabric prints, and more with this attention-grabbing tote. You’ll be able to fussy-cut fabrics or even feature a special photograph with this design.

The Snowball and Square-in-a-Square blocks are skillfully pieced either by the embroidery machine or by paper piecing with a sewing machine. Finished quilt blocks measure 2-3/4″ x 2-3/4″.
Accurately Piece Quilt Blocks with Machine Embroidery
Here’s a brief look at the fabrics and steps you’ll need to create each block in the hoop:
Square-in-a-Square Block:
- Required fabric pieces:

- Hoop a single layer of Cut-Away No-Show Fusible Mesh Stabilizer.
- Stitch thread Color 1, the numbered stitching sequence of the block design, directly onto the stabilizer.

- Place Section 1 fabric square over the Section 1 stitched on the stabilizer base, right side up. Fabric must cover the stitched lines.
- Fuse in place with a mini-iron.
- Stitch thread Color 2 to baste down fabric Section 1.

- Trim away excess fabric along previously stitched basting line.
- Align Section 2 fabric triangle edges, right sides together. Make certain fabric extends equally beyond the outline on the stabilizer at opposite ends.
- Embroider thread Color 3 to stitch this section of the block.

- Fold the fabric section over the stabilizer.
- Start pressing along the folded edge with a mini-iron, working to the outer edge to eliminate any wrinkles.
- Embroider with thread Color 4 to baste pressed section in place.
- Trim excess fabric past basting line.

- Add fabric Section 2, following the numbers consecutively.

- Embroider, flip, press, baste, trim, and move to the next section.
 .
.
- Continue adding pieces until the block is complete.
- Finish with the last thread color, basting the blocks edges.

- Trim the block per the package directions.

Snowball Block:

- Simply follow the detailed directions included in the package to apply each fabric section in consecutive order, similar to the construction of the Square-in-a-Square block.
- This is the finished and trimmed block.

Foundation Paper Piecing Templates
You can also use this design bundle to print foundation paper piecing templates. Use them as you would any other foundation pieced pattern. Detailed instructions are included in this bundle. Here’s an overview:
- Print off as many blocks as you need, using the embroidery software program.
- Place Section 1 fabric square over the Section 1 printed on the foundation paper, wrong side of fabric to wrong side of paper foundation. The fabric must extend past the printed lines.
- Pin.

- Place Section 2 fabric triangle aligned with the corresponding edge of pinned fabric square, right sides together.
- Pin.

- Stitch right on the Section 2 printed line.

- Trim threads.
- Remove pin and press fabric triangle over Section 2 of the paper foundation using a mini iron, Little Wooden Iron, or Hera Marker.
- Mark for Section 2 trimming line by placing a gridded quilting ruler on the foundation paper, aligning the ruler’s 1/4″ line on the stitching line.
- Using the curved edge of the Hera marker, emboss a foldline along the ruler’s edge.
- Remove the ruler and fold back the paper onto itself.

- Repeat for remaining corner of Section 2.


- Trim away excess with rotary cutter.

- Continue in sequential order to add fabric sections, fold, and trim. Press each section along the way.

- Lastly, stitch around the marked perimeter line to secure the block. Trim per the instructions.

Sew and Quilt the Projects
This extensive design bundle includes two project patterns: a tote and a table topper.
- Prepare the required number of blocks for the design you choose.
- Assemble them per the directions.
Use the Embroidery Machine to Quilt

- Add the first quilting lines by using a Walking Foot to stitch “in the ditch.”

- Use the floral quilting design included to plan the computer (embroidery machine) guided quilting.
- Print a template using an embroidery software program, such as Amazing Designs® Edit Xpress.
- Position paper on fabric at desired location.

- Align the project in the embroidery hoop. Quilt the design.

- Repeat quilting steps in all areas that you would like quilted.
Use a Free-Motion Quilting Foot to Quilt
- Print the flower quilting design motif onto paper.
- Trace the design onto quilting paper.

- Cut to separate each of the quilting paper patterns.
- Position pattern, then tape to fabric at desired location.

- Use the Free-Motion Quilting Foot to quilt. Use the paper as a guide.

- Remove the quilting paper.

- Repeat quilting in all desired locations.
Free Collectible Pin
Receive a FREE Nancy’s Notions Sewing Weekend collector pin by registering for ticketed events (excluding lunch). Visit SewingWeekend.com to view event details. I look forward to seeing you next week at Sewing Weekend, May 4, 5 & 6, 2017 in Beaver Dam, WI.

Watch Stress-Free Quilting with Machine Embroidery on Sewing With Nancy online.
Bye for now,
![]()
Content in this feed is © copyright 2017 by Nancy Zieman and may not be republished without written permission. You’re welcome to forward the email to a friend or colleague but it’s not okay to add the RSS feed automatically as content on a blog or other website.
The FTC requires us to tell you that Nancy Zieman has provided products by other companies in the course of her business. The FTC requires us to advise you to take this information into consideration when reading this posting.


Clovis
You make it look so easy.
Marvel D.
I love love love this bag. There are so many ways to use the open (White centers) of the blocks to show off patches, pictures, pins, and buttons. My head is spinning with ideas. Thanks for the great pattern. Marvel
Lynne
What a fun bag!!!
Susan Spiers
Great idea-need one for all my collectible pins that tell my travelling story! Thank you, Susan
Jacque Horner
I hadn’t thought of using my grands in a snowball block but think I certainly will now. Thanks for the idea.
Jody
I have a worn out tote with all of my travel patches half falling off! This is an ideal way to be able to sew them on the block as I make the tote. Thanks for a terrific idea!
Karen Poole
Wow! I LOVE this!! I have so many pins and have been trying to decide how I wanted to display them and this is perfect!!
Pat
Wish I could come but can’t. Are pins available for sale?