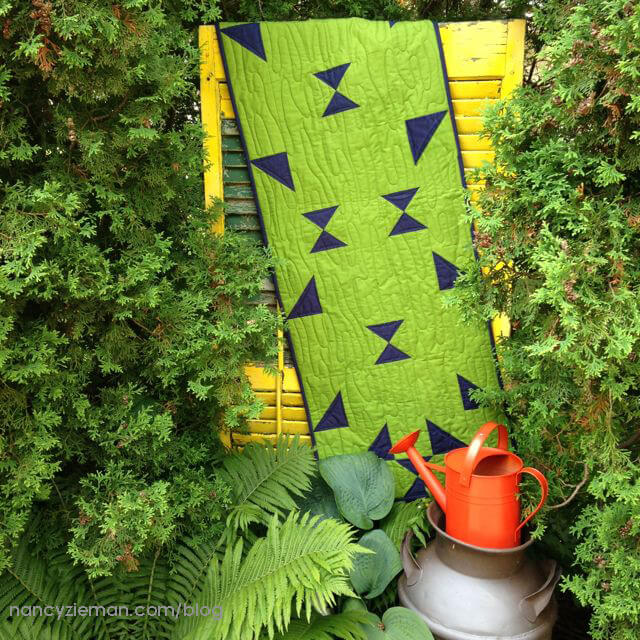
Growth Chart Wall Hanging Tutorial

Sew our easy Wall Hanging or Table Runner project with colorful & convenient 2-1/2″ precut fabric strips. Quilt with confidence when starting with a 2-1/2″ precut fabric strip bundle – all the fabrics will coordinate and the finished project will add a fresh home decor accent to any room in your home. Plus, the fabric strips are already cut! With our easy sewing tutorial below, turn this beautiful quilted project into a Growth Chart Wall Hanging. Today we’re sharing step-by-step how to add optional tape measure twill tape and appliqued numbers. This project is ideal for beginners and seasoned sewists, alike!
Watch Stitch it! Sisters Program 117: Growth Chart Quilted Wall Hanging Sewing Tutorial Video
Watch Stitch it! Sisters Program 117 Growth Chart Wall Hanging and see how easy it is to make our Growth Chart Wall Hanging Sewing Project. Save time not cutting fabrics into 2-1/2″ strips and make our Table Runner or Wall Hanging with 40 beautiful 2-1/2″ fabric strips–already pre-cut for you! We’ve designed our Growth Chart Project to be enjoyable to sew, and to decorate a wall – while providing an attractive presentation for recording memorable moments — along with children’s heights – as they grow! Plus shop our Fall Savings Sale now thru October 31st!


Shop our Patterns and Exclusive Bundle Boxes at ShopNZP.com

Exclusive I Sew For Fun Growth Chart Wall Hanging Pattern

 Then, head over to ShopNZP.com and purchase our limited edition Exclusive Wall Hanging Bundle Box! Our fun Bundle Box contains everything you’ll need to make this project, including NZP’s Wall Hanging Pattern — with full-color step-by-step instructions, and exclusive Classic Timesaving Sewing Tips by Nancy Zieman!
Table Runner/Wall Hanging & Growth Chart Sewing Tutorial
Approximate finished size: 24″ W x 64″ H
Wall Hanging/Table Runner Tools & Supplies:
- Exclusive Growth Chart Wall Hanging Bundle Box
- 60 I Sew For Fun Heart Shaped Straight Pins
- Clover’s Pin ‘n Stow Magnetic Wrist Pin Cushion and/or I Sew For Fun Heart-Shaped Magnetic Covered Pin Caddy
- Clover’s 7-3/4″ Bordeaux Ultimate Shears
- I Sew For Fun Sew Safe Presser Foot or 1/4″ Quilting Presser Foot
- Open Toe Applique Presser Foot
- Clover’s Straight Tailor’s Awl/Stiletto
- Quilter’s Starch Savvy
- Non-Stick Teflon Pressing Sheet
- Tailor’s Clapper
- Clover’s Rotary Cutter and Mat, & Ruler
- Schmetz Size 90/14 Chrome Quilting Needles
- Optional: Quilt Basting Spray
- Optional: Schmetz Size 90/14 Super Nonstick Sewing Machine Needles
Create Strip Sets

 Preshrink 2-1/2″ precut fabric strips by steaming and pressing, and steaming and pressing a second time, and then spray press and starch fabric with June Tailor’s Quilter’s Starch Savvy — press and starch, press and starch.
- Using a rotary cutter, mat and ruler, cut thirty-one 12-1/2″ long light tone fabric strips; and thirty-one 12-1/2″ long medium/dark tone fabric strips – from 2-1/2″ Precut Fabric Strips – Fairy Edith fabric bundle.

- Pair dark and medium tone fabric strips with light tone background fabric strips.

- Place fabric pairs right sides together and pin through all layers – at each short edge.

- Using a new Schmetz Size 90/11 Chrome Quilting Needle, and a 1/4″ Quilting Presser Foot, stitch each end of strip sets with scant 1/4″ seam allowance, to create fabric tubes.

 Attach a 1/4″ Quilting Presser Foot to machine, and chainstitch strips continuously. Chainstitching with a 1/4″ Quilting Presser Foot saves time and maintains accuracy!
- Clip threads between each strip set.

- Press all seam allowances flat, to set the stitches. Then, press seams open.
 Press seams open using the steam from your iron, then press seam with Tailor’s Clapper, and hold for just a few seconds, it will leave a nice flat crisp professional looking seam.
Determine Layout
- Fold each tube in half, varying the amount of visible light background fabric.

- Using Clover’s 7-3/4″ Bordeaux Ultimate Shears, cut along both folded edges of each fabric tube – creating two flat strata strips from each tube.

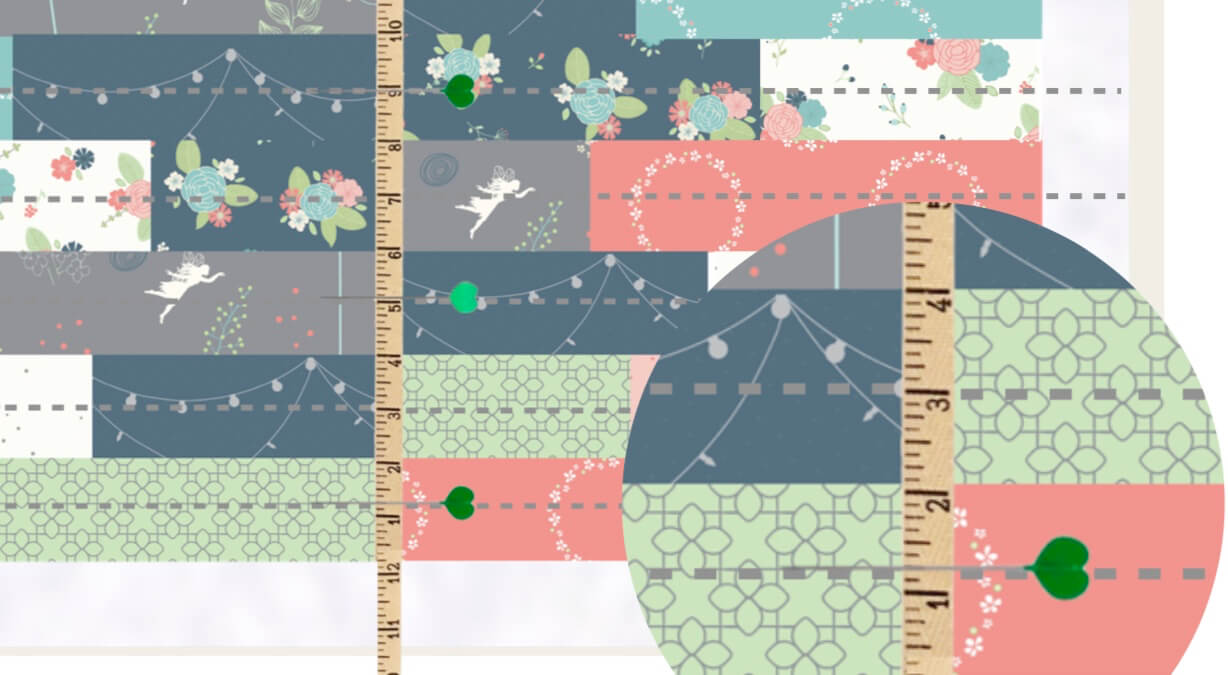
- Layout and stagger strata strips in two columns: Column A and Column B. Place strata strips with dark fabrics toward center. Layout in desired your order, or according to illustration (below).

- Offset fabric strips by one row. Position one half of one strata strip at the top of Column A. Position the second half of the same strata strip at the bottom of Column B.
 For future reference when later assembling quilt, take a digital photo of your quilt layout – before moving on to the next step.
Assemble the Wall Hanging
- Place Column A strata strips, right sides together, in pairs. Pin along along one long edge.

- Using a 1/4″ Quilting Presser Foot, stitch each strata set pair with scant 1/4″ seam allowance, while chain-stitching strata pairs.
- Press seams flat, then press to one side.

 Use a Clover’s Straight Tailor’s Awl/Stiletto to help guide the seam allowances under presser foot.
- Stitch strata pairs together. Press seams flat, then press to one side – in the same direction as Column A strata pairs.

- Continue stitching strata pairs together until Column A strata strips are completely sewn together. Press seams flat, then press seams in the same direction.

- Repeat steps above, stitching Column B strata strips, right sides together, in pairs. Press seams flat, then press to one side – in the opposite direction of Column A seams.

- Continue stitching strata pairs together until Column B strata strips are completely sewn together. Press all Column B seams in the opposite direction of Column A seams.

- Place Column A to Column B with right sides together. Pin.

- Stitch Column A to Column B, with scant 1/4″ seam allowance and 1/4″ Quilting Presser Foot.

- Press seam flat to set the stitches. Then, press seam open.

Machine Quilting
- Prepare quilt for straight line machine quilting. Create a quilt sandwich, layering the quilt top, batting, and backing. Spray baste layers together using Quilt Basting Spray, hand-baste, or pin baste layers together.
 Use Team NZP’s Ultimate Quilt ‘n Stitch Presser Foot for quick and easy straight line machine quilting your wall hanging!
- Insert a new Schmetz Size 90/14 Super Nonstick Sewing Machine Needle (if you’ve used Quilt Basting Spray) and begin stitching in the center of quilt – working outward towards narrow quilt edges. Stitch with a single straight stitch through center of each strata strip. Rotate quilt with each seam, stitching rows in opposite directions.

- Center Tape Measure Twill Tape over center quilt seam – between Column A and Column B.

- Position the 2″ marking on Tape Measure Twill Tape at two inches from the quilt lower edge. Pin.
 Be sure to position the Tape Measure Twill Tape, in the center of the quilt – with the numbers counting upwards towards quilt top edge.
- Topstitch along each long edge of Tape Measure Twill Tape using monofilament thread. Trim away excess twill tape extending beyond quilt edges.
 Machine Appliqué
- Locate Appliqué Numbers on Pages 11 of NZP’s Exclusive Growth Chart Wall Hanging Pattern.
- With pencil, trace reversed numbers 1 through 6 on paper side of Wonder-Under paper backed fusible web.


- Following manufacturer’s instructions, place rough side of Wonder-Under to wrong side of solid black cotton fabric. Press with dry iron. Allow to cool.


- Using a craft scissors, cut out number appliqués. Gently peel off Wonder-Under paper backing.


- Position fusible appliqués, to right side of quilt, about every twelve inches. Alternate number appliqués in Column A and Column B. Center numbers halfway between quilt edges and Tape Measure Twill Tape.
Place numbers along same plane as 12″ markings on Tape Measure Twill Tape/Ribbon. Beginning at the bottom of the quilt, place number 1 or 2, and work upwards placing remaining numbers. NOTE: See Hanging Options on (below) to determine your desired numbering layout; 1-5 or 2-6.
- Using a Non-Stick Teflon Pressing Sheet, press number appliqués to quilt using a dry iron.

- Attach an Open Toe Applique Presser Foot, and set sewing machine for an appliqué stitch, blanket stitch, or medium zigzag stitch (3.5 mm width, 1.4 mm length).
- Stitch around outside edges, and inside edges, of appliqué numbers.


When stitching –or appliquéing– numbers to quilt, stop with needle down on the outside of appliqué fabric when turning outside curves or corners; and stop with needle down on the inside of appliqué fabric when turning inside curves and corners! Always test stitches on a sample appliqué number– fused to a fabric scrap.
Quilt Binding
- Finish quilt, using your favorite binding technique. Find Nancy Zieman’s favorite binding method right here at Nancy Zieman Productions blog.

Hanging Options
- Hang Growth Chart on wall at 12″ above floor; when numbering wall hanging with numbers 2 – 6.

- Hang Growth Chart on wall with binding touching floor; when numbering wall hanging with numbers 1 – 5.

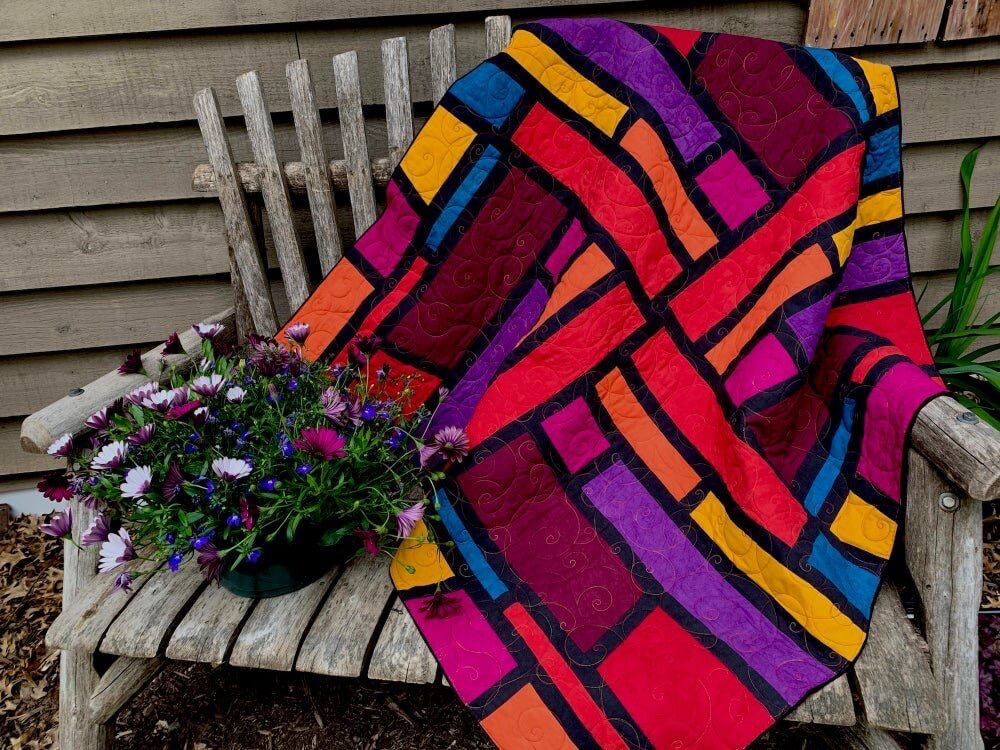
Our Growth Chart is attractive, functional, and fun! Record growth measurements – anywhere on quilt front – with a silver metallic paint pen, and/or permanent fabric markers. Or, choose to skip the tape measure twill tape and appliqué numbers, and make a beautiful new table runner or wall hanging for your home!

Table Runner/Wall Hanging & Growth Chart Tools & Supplies:
- Exclusive Growth Chart Wall Hanging Bundle Box
- 60 I Sew For Fun Heart Shaped Straight Pins
- Clover’s Pin ‘n Stow Magnetic Wrist Pin Cushion and/or I Sew For Fun Heart-Shaped Magnetic Covered Pin Caddy
- Clover’s 7-3/4″ Bordeaux Ultimate Shears
- I Sew For Fun Sew Safe Presser Foot or 1/4″ Quilting Presser Foot
- Open Toe Applique Presser Foot
- Clover’s Straight Tailor’s Awl/Stiletto
- Quilter’s Starch Savvy
- Non-Stick Teflon Pressing Sheet
- Tailor’s Clapper
- Clover’s Rotary Cutter and Mat, & Ruler
- Schmetz Size 90/14 Chrome Quilting Needles
- Optional: Quilt Basting Spray
- Optional: Schmetz Size 90/14 Super Nonstick Sewing Machine Needles


Join the 2025 Nancy Zieman Productions Fall Table Runner Sewing Challenge! Find all the details at our October 2 Fall Table Runner Sewing Challenge Blog Posting.


Register Today for our Upcoming Classes!

NEW! One Day Only–Lutterloh System Pattern Making Custom Fitting Lecture/Demo, with the-one-and-only Ralph Lutterloh, at The Nancy Zieman Sewing Sewing and Quilt Shop in Downtown Beaver Dam WI. FREE to Attend. Seating is Limited. Register today in store at The Nancy Zieman Sewing Studio or online at ShopNZP.com.


Register Today for our Fall Classes!

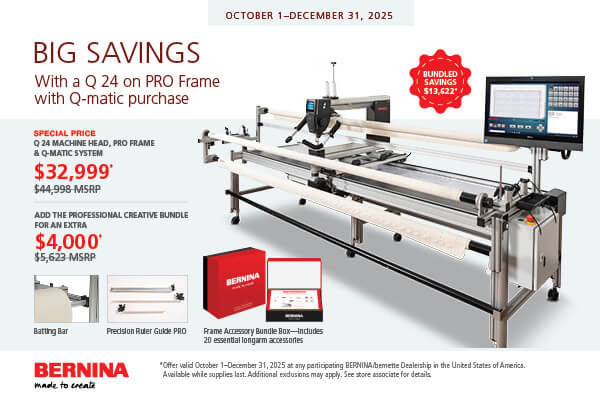
PLUS! NEW Consumers who Open a NEW! BERNINA Credit Card and use it to make a qualifying single-receipt purchase will receive one of the following. *Offer Valid October 1st – 31st, 2025.
$50 Statement credit for purchases of $1,999 – $4,998*
$100 Statement credit for purchases of $4,999 or more.
See store for details.
Call today to reserve the sewing machine, serger, embroidery machine, or Longarm you’ve been waiting for • 920-356-9546 store
The Nancy Zieman Sewing Studio and Quilt Shop is an award-winning BERNINA Excellence Dealer! Stop in and experience premium Swiss engineering in a wide range of sewing machines, sergers, and Q-Series long arm machines–to fit all your sewing needs–and purchase the machine of your dreams!


Nancy Zieman Sewing Studio
120 Front Street
Beaver Dam, WI 53916
920-356-9546 phone
Store Hours
Monday through Saturday 10 a.m. to 4 p.m.
And by appointment
Parking Behind Store
NANCY ZIEMAN SEWING STUDIO
120 FRONT STREET
BEAVER DAM, WI 53916
INFO[at]ZIEMANPRODUCTIONS[dot]COM
920-356-9546 phone
Happy Sewing!
Team Nancy Zieman
Nancy Zieman Productions. LLC.

Stitch it! Sisters is a production of NZ Productions LLC. Content in this feed is © copyright 2025 by Nancy Zieman Productions, LLC and may not be republished without written permission. You’re welcome to forward the email to a friend or colleague but it’s not okay to add the RSS feed automatically as content on a blog or other website. The FTC requires us to tell you that Nancy Zieman Productions, LLC has provided products by other companies in the course of doing business. The FTC requires us to advise you to take this information into consideration when reading this posting.